Example Scenario
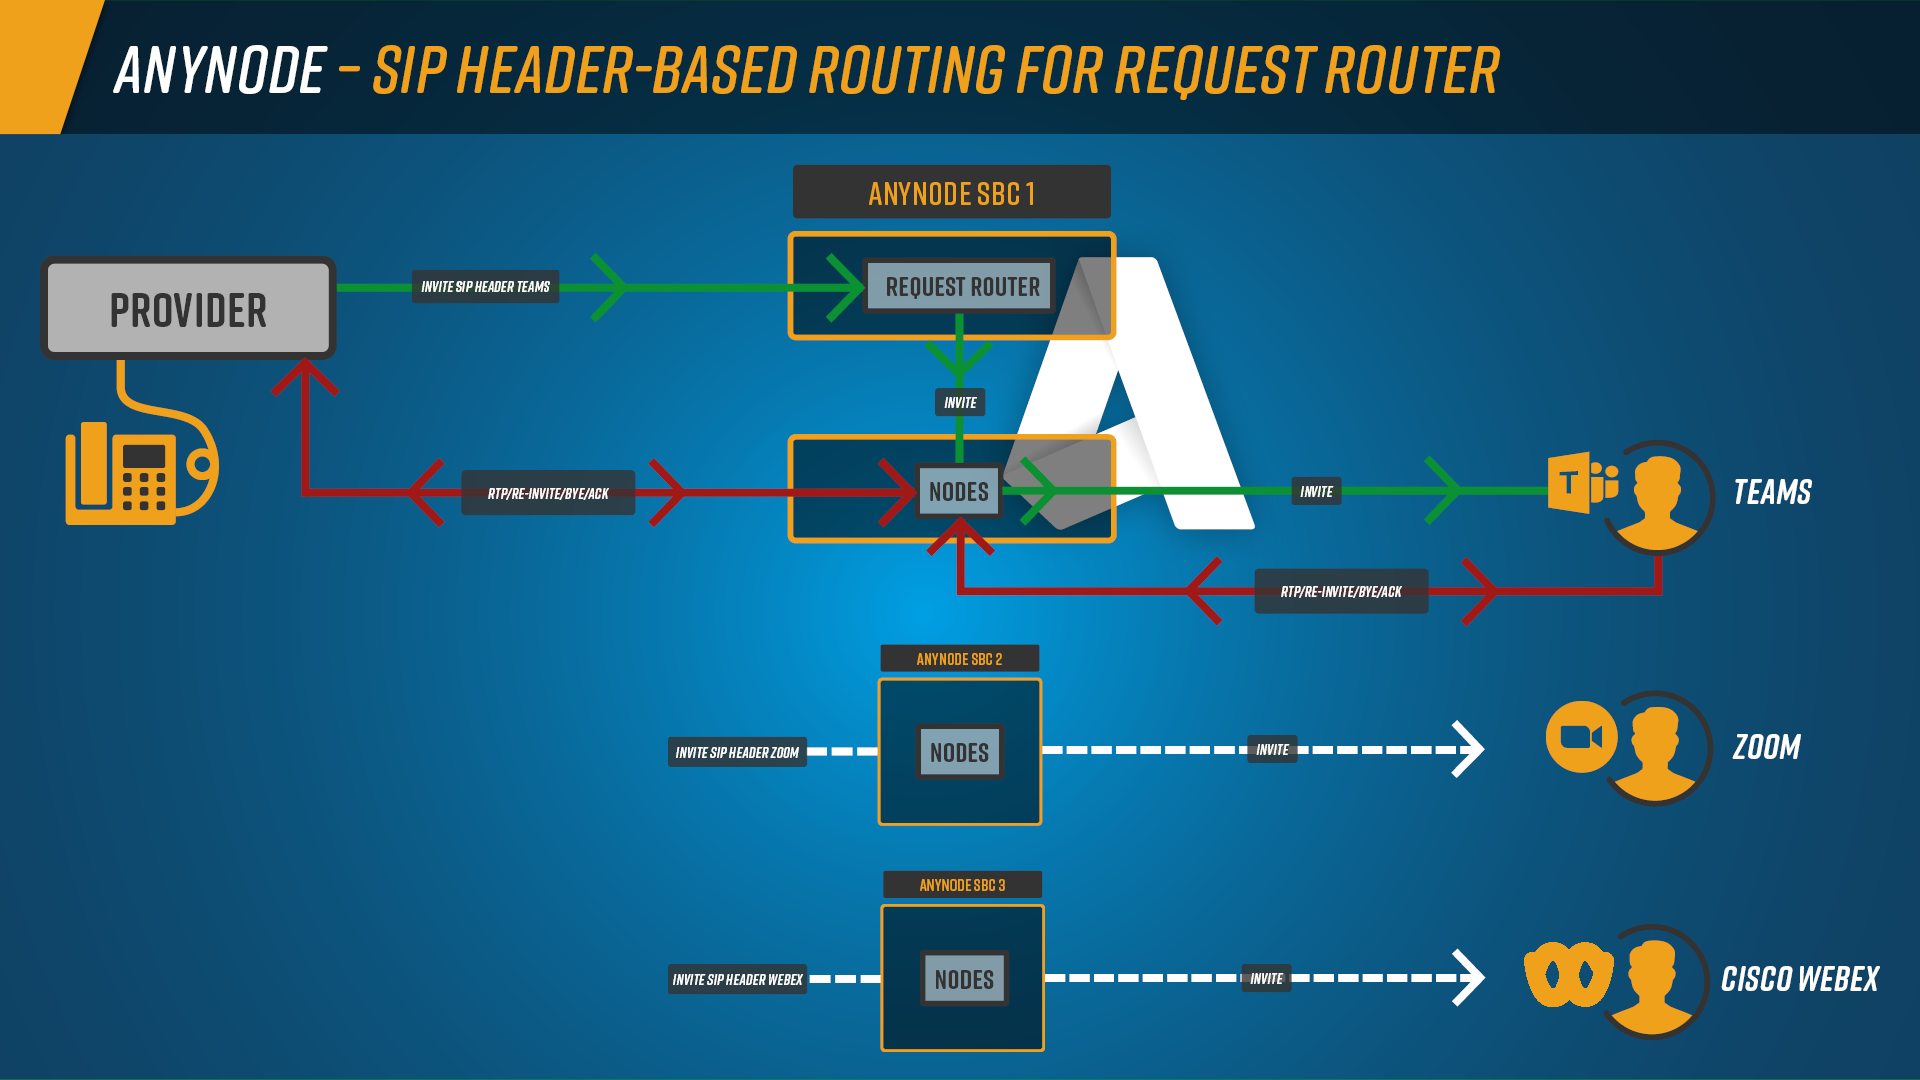
To illustrate this capability, we introduce a practical example scenario in which multiple anynode SBCs are deployed in parallel. In this setup, each SBC serves a dedicated purpose: one anynode SBC is used exclusively for Microsoft Teams, another for Zoom Phone, another for Cisco Webex, and an additional system (not shown in the infographic) acts as a PBX fallback. Using the Request Router, incoming calls are evaluated and routed to the appropriate target system based on the content of the SIP headers.
With SIP Header-Based Routing, anynode extends the functionality of the Request Router by allowing
routing decisions to be made based on any SIP header field. Instead of relying solely on traditional
load-balancing mechanisms, the routing table can now evaluate headers such as To, From, P-Asserted-Identity,
or custom X-headers like X-Platform. This enables a clear separation of traffic from different platforms and
allows calls from a single provider connection to be distributed deterministically across multiple anynode SBCs.
In the example scenario used throughout this chapter, routing decisions are consistently based on the X-Platform
SIP header. This custom header is added to incoming SIP requests to explicitly indicate the target
communication platform. Depending on the value of the X-Platform header—such as Teams,
Zoom, or Webex—the Request Router evaluates the routing table and forwards
the call to the corresponding anynode SBC. By using a dedicated header for platform identification, the routing logic remains
transparent, easy to maintain, and clearly separated from number-based or topology-specific routing decisions. This approach
is especially useful in hybrid and multi-platform environments, where different UC systems must
be served in parallel while maintaining predictable and reliable routing behavior.
We start with a basic Request Router scenario in which the target system SBC 1 is already configured using the Request Router Assistant. These steps are described in the chapter Add Request Router and are therefore not repeated here.
-
At this stage, create only one target, pointing to SBC 1. In our example, the target is named SBC 1 (Teams)
-
Name it Request Router Provider (SBC1).
Add New Transport Connections for Zoom, Webex and PBX
In the next step, we add a new transport connection for Zoom
-
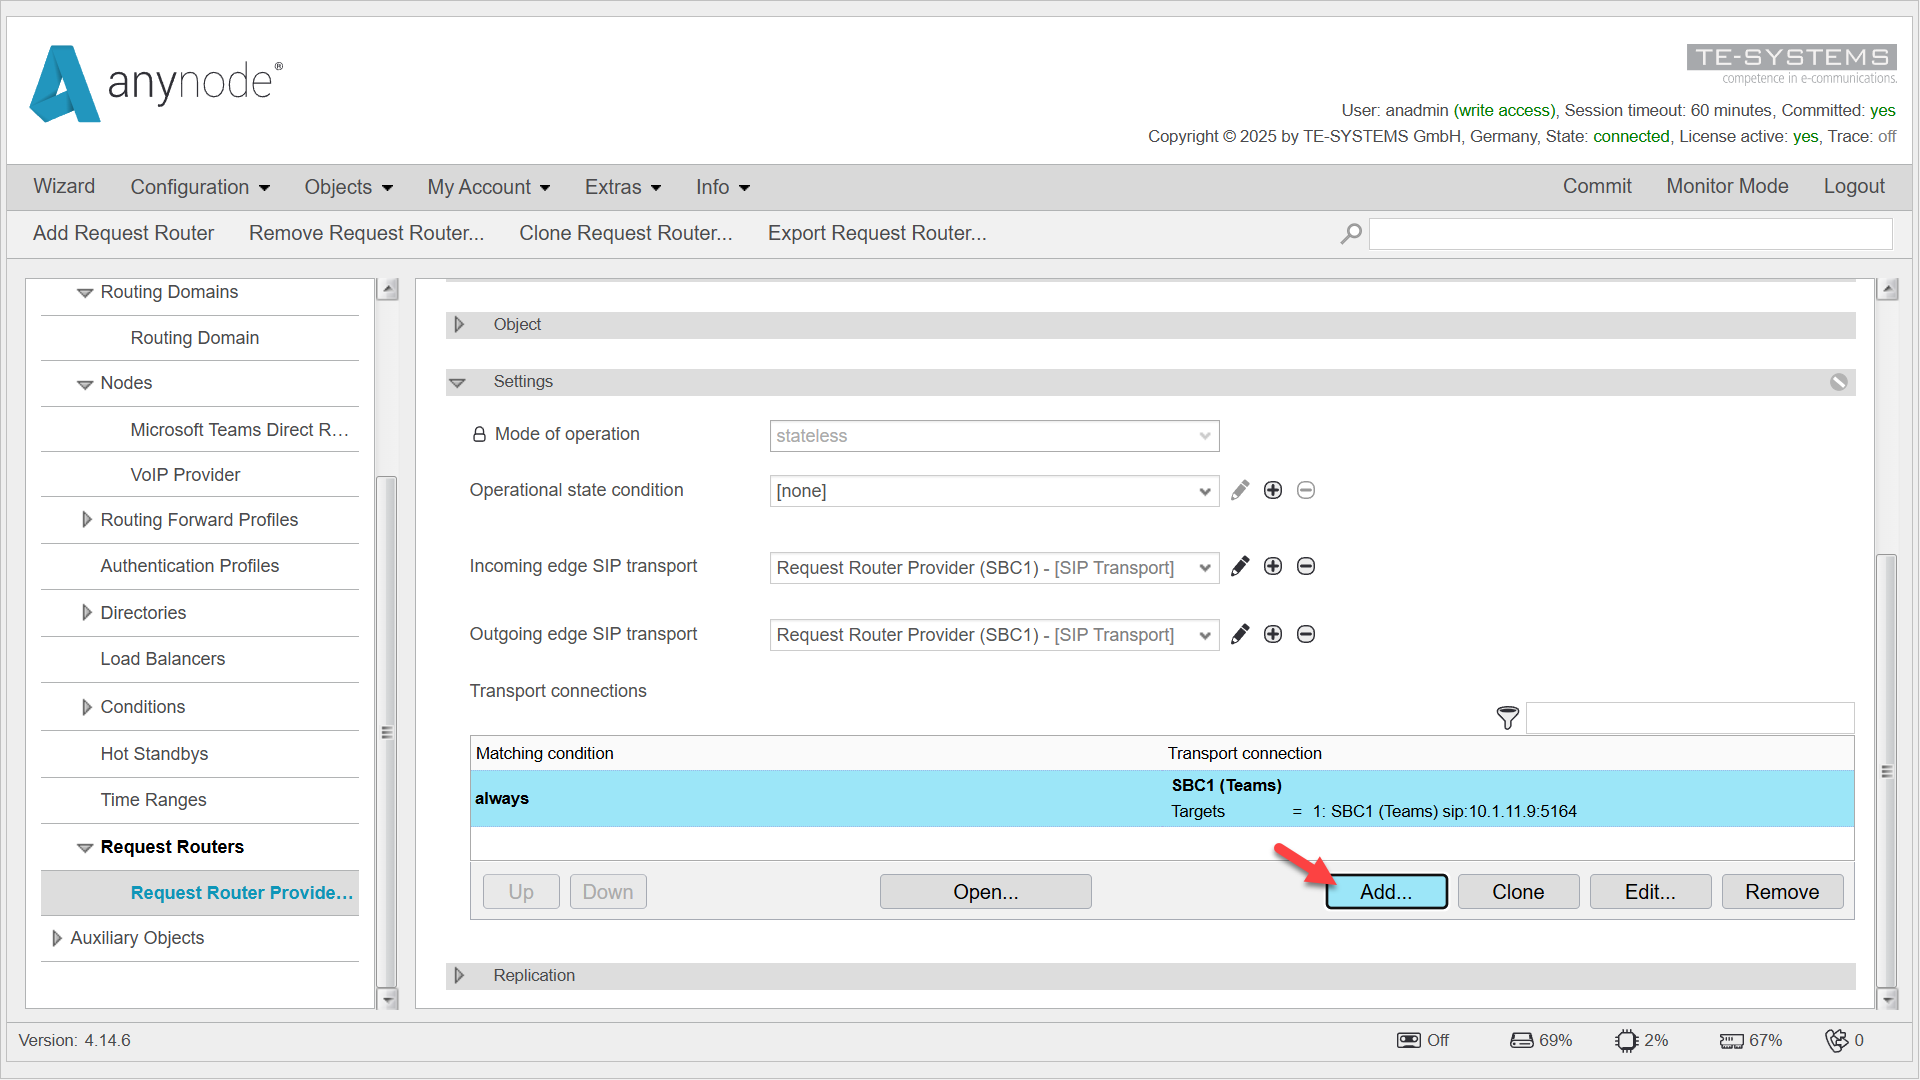
In the Request Router object in the Settings, navigate to the Transport Connections.
-
Click on the Request Router Provider.
-
Click on .
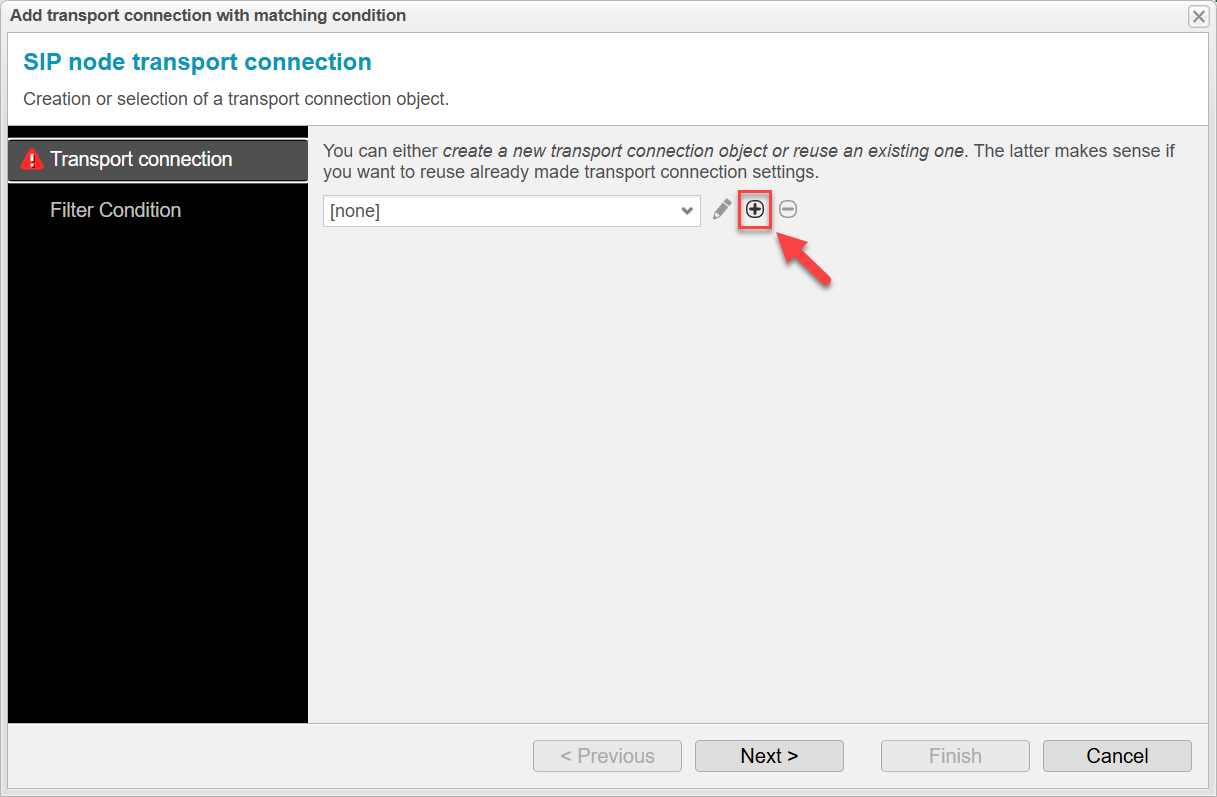
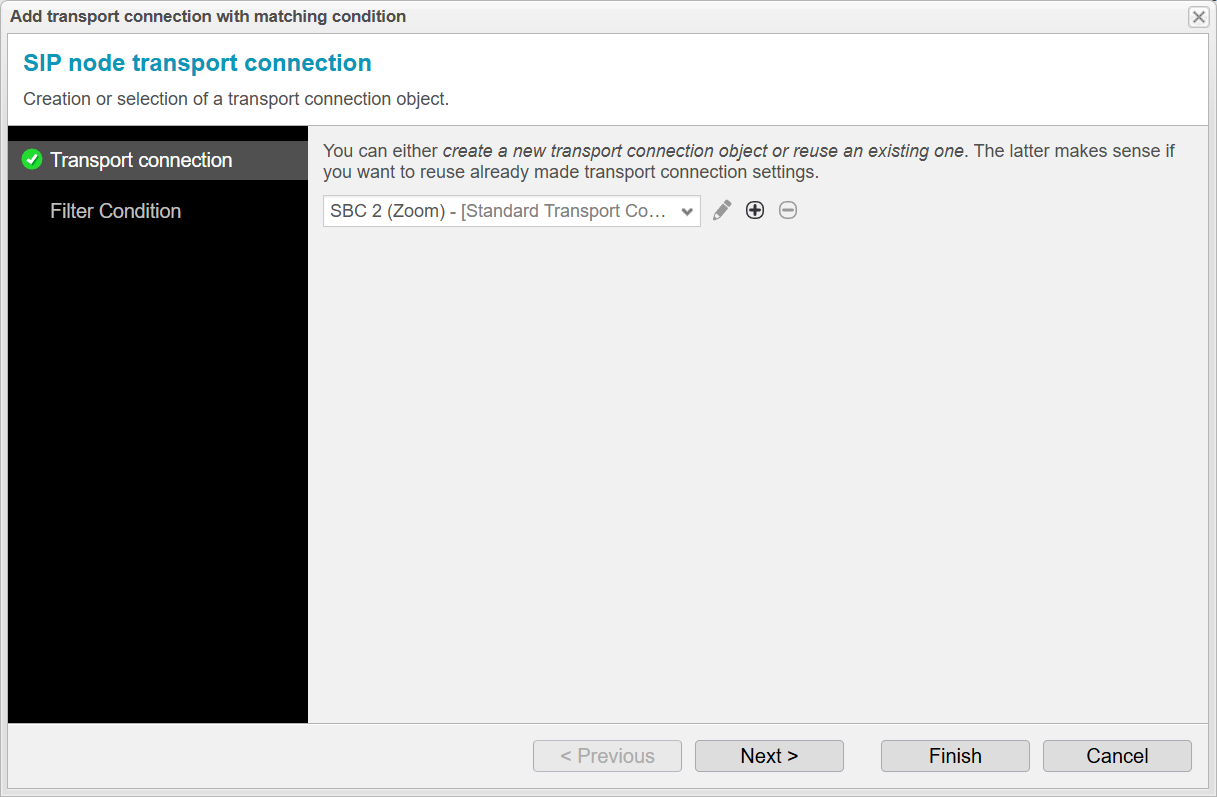
You can either create a new transport connection object or reuse an existing one.
-
Create a new transport connection object.
-
Click on the .
-
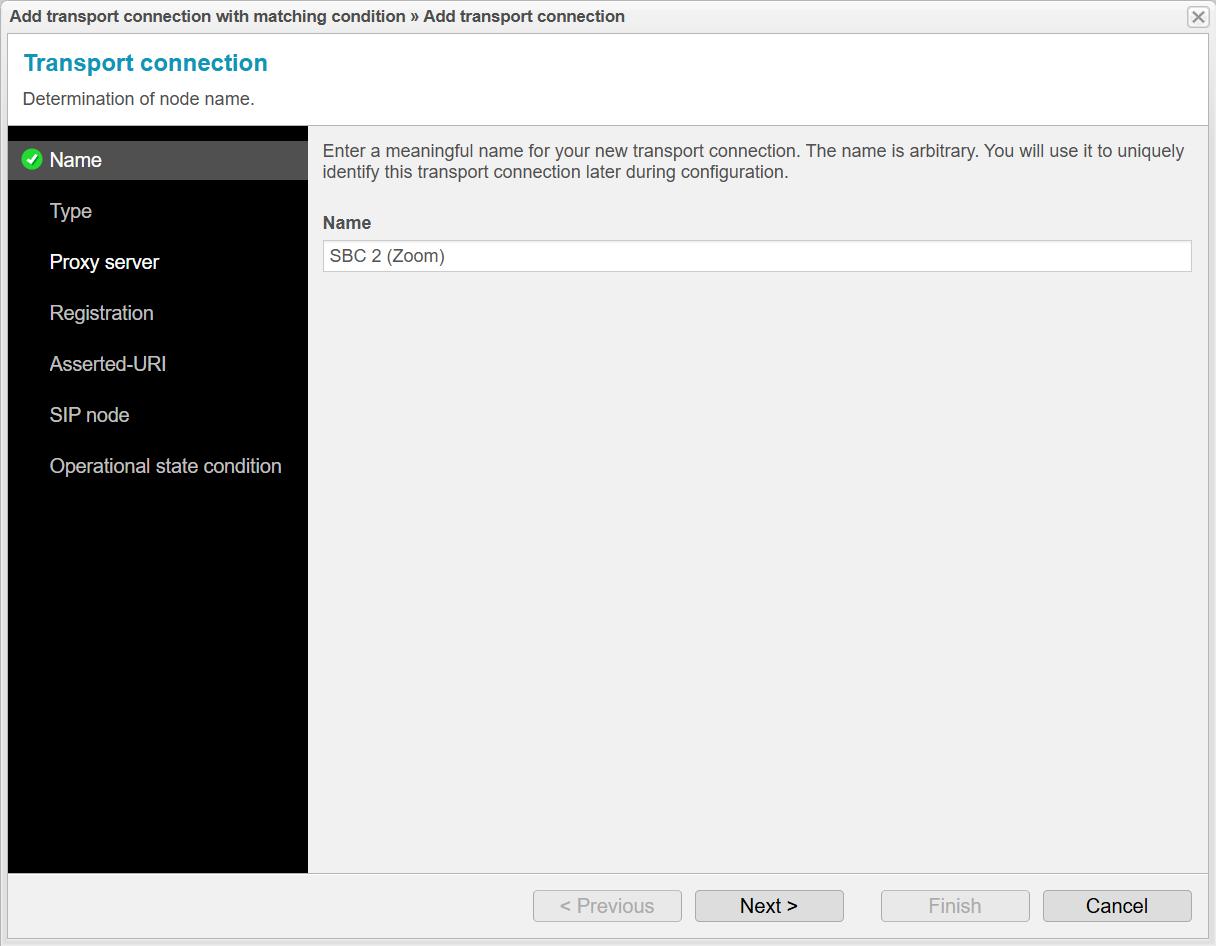
Enter a meaningful name for your new transport connection
(In our example, we use SBC 2 (Zoom).)
-
Click on .
-
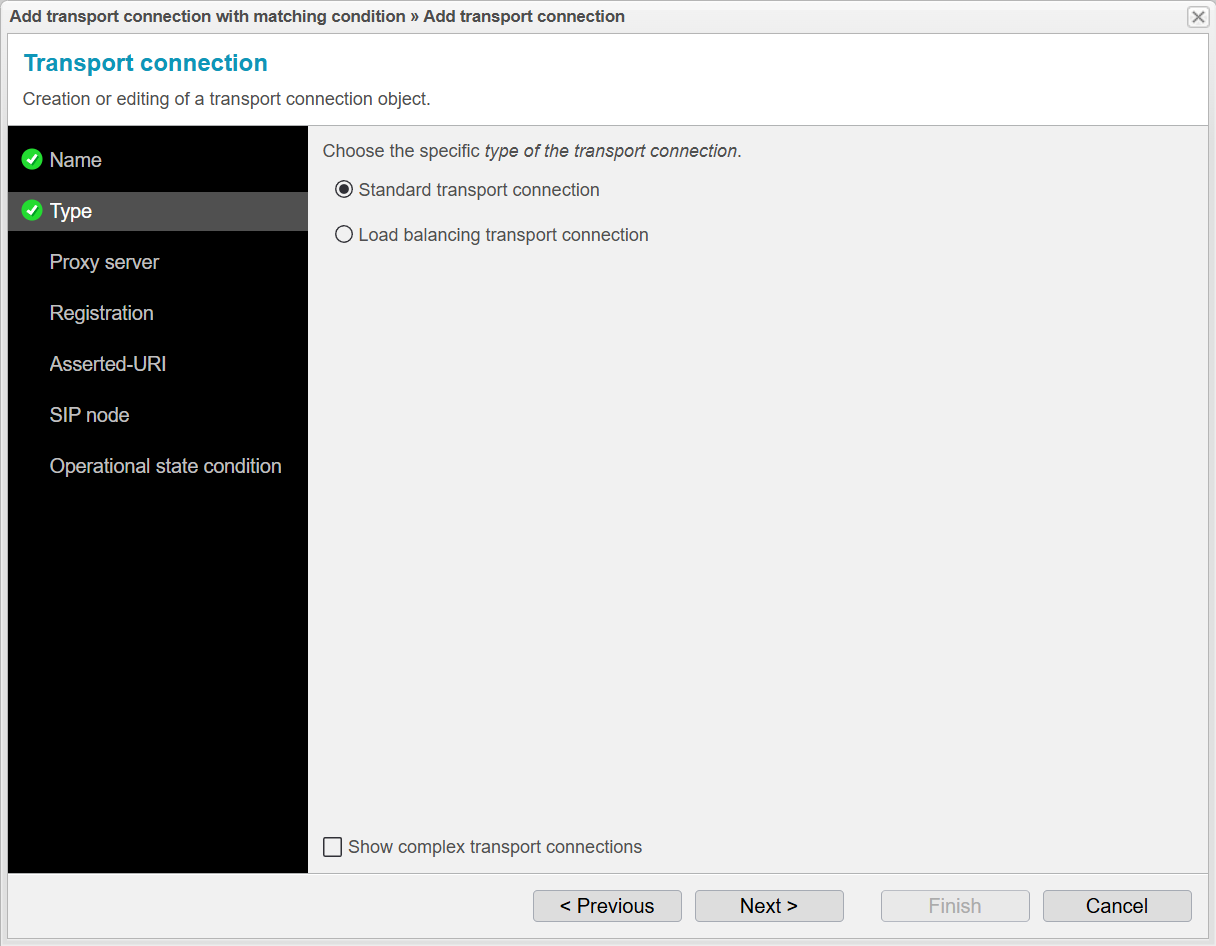
Choose Standard transport connection as the specific type of transport connection.
-
Click .
-
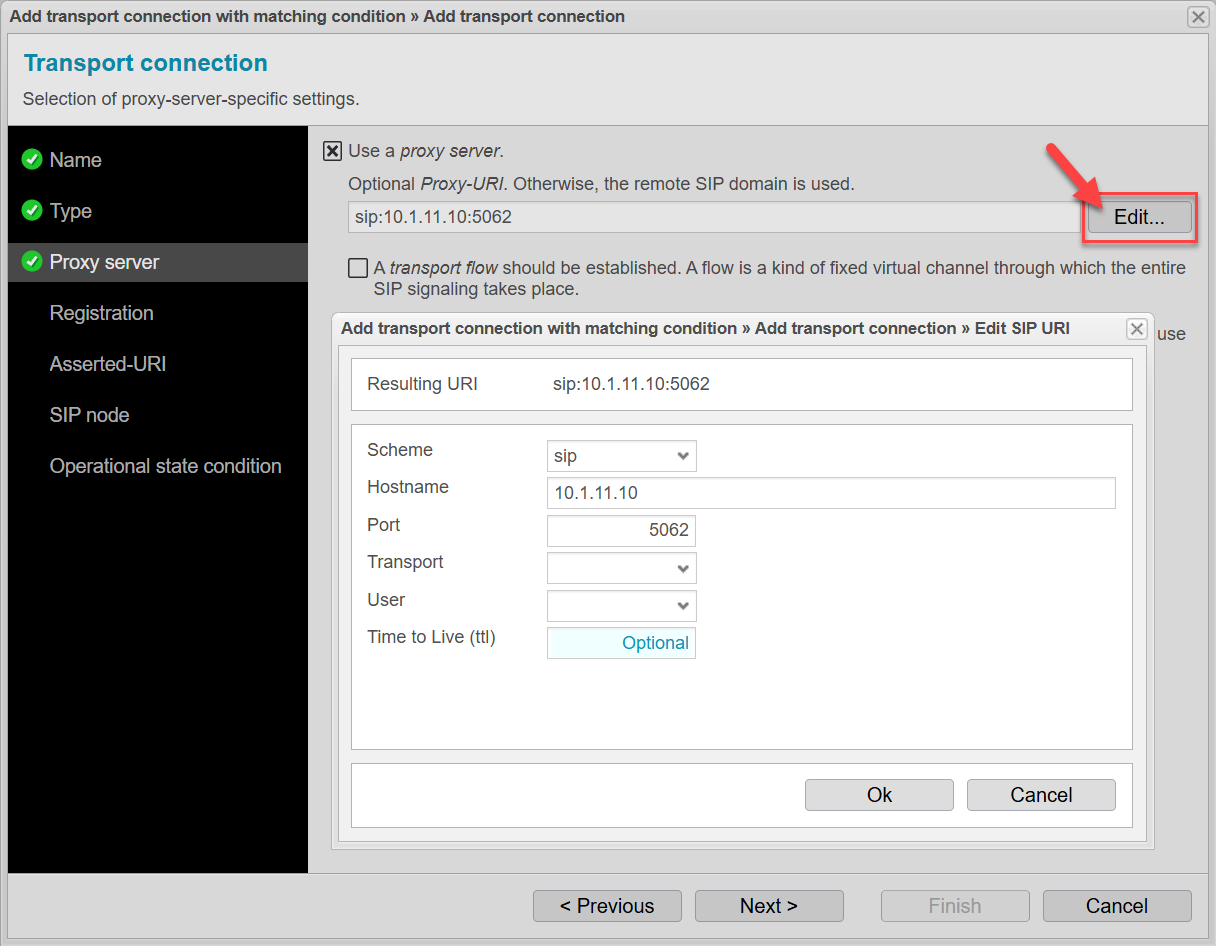
Activate Use a proxy server.
-
Use the input help with .
-
Enter the hostname or IP and optional port of the second anynode target system SBC 2 (Zoom).
-
Click .
-
Click .
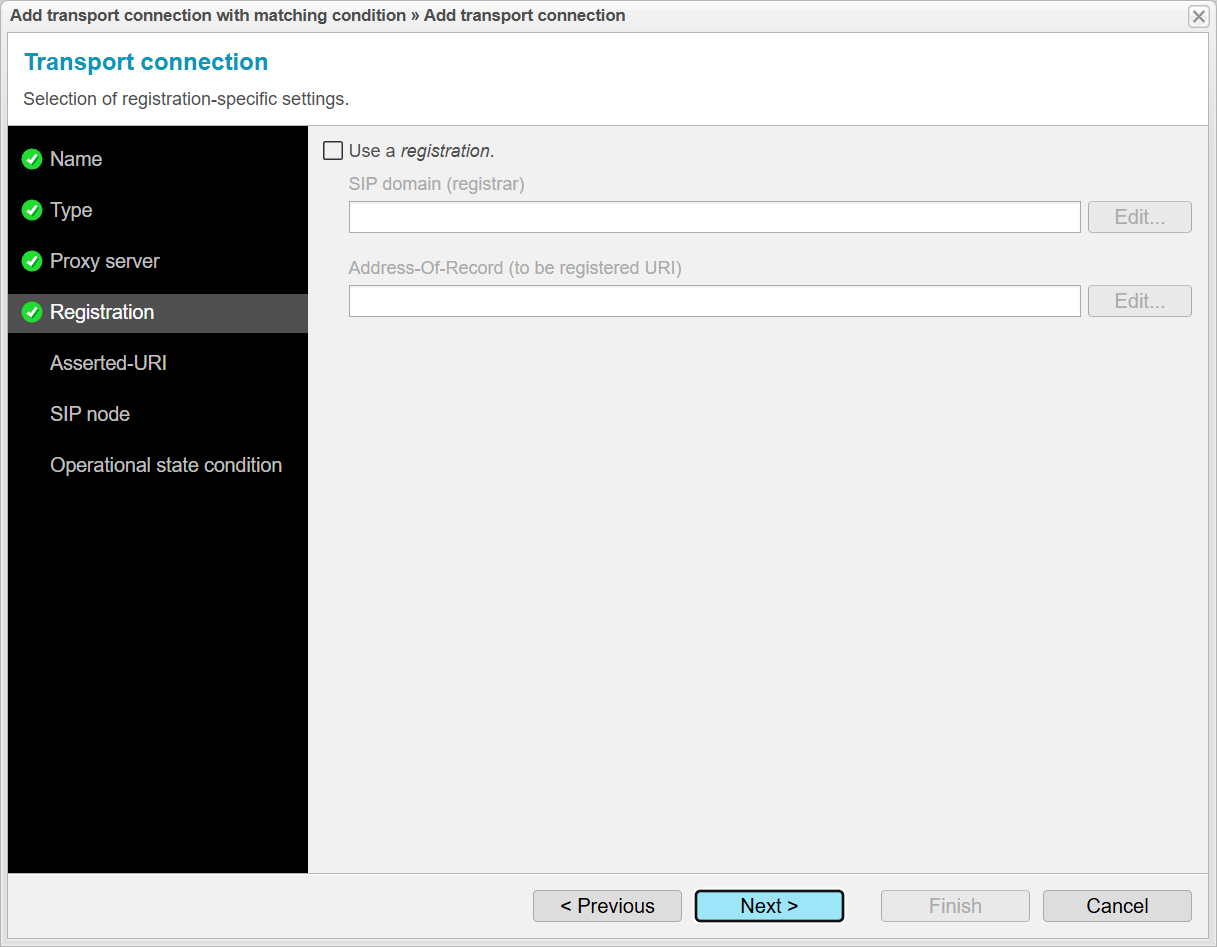
The Registration menu item allows anynode to manage SIP user registrations. This is especially important if anynode acts as a registrar or forwards registration requests to other registrars. We do not need this feature for our example.
-
Click .
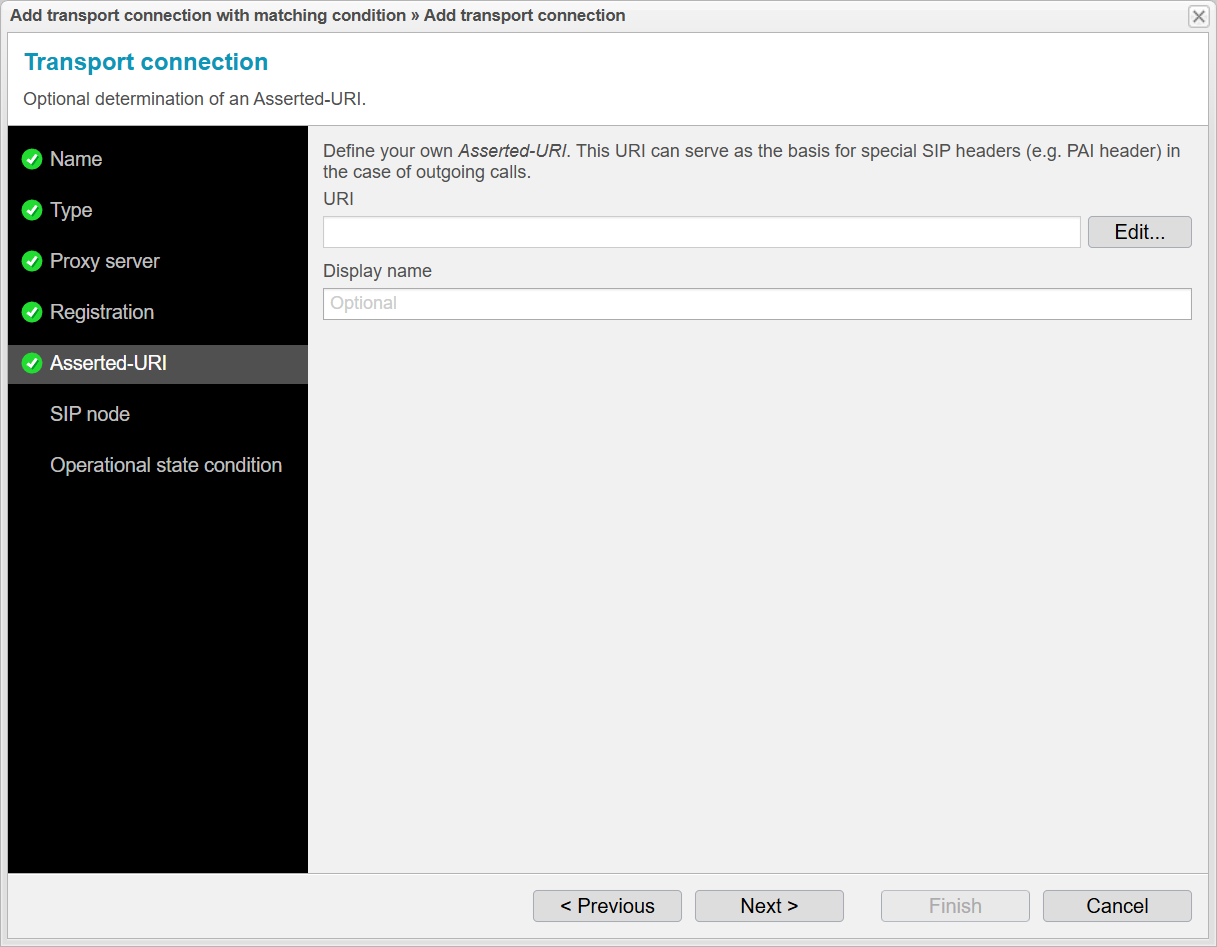
When integrating another target system, the Asserted URI ensures that the identity of users and systems is transmitted and verified correctly and reliably. We do not need this feature for our example.
-
Click .
-
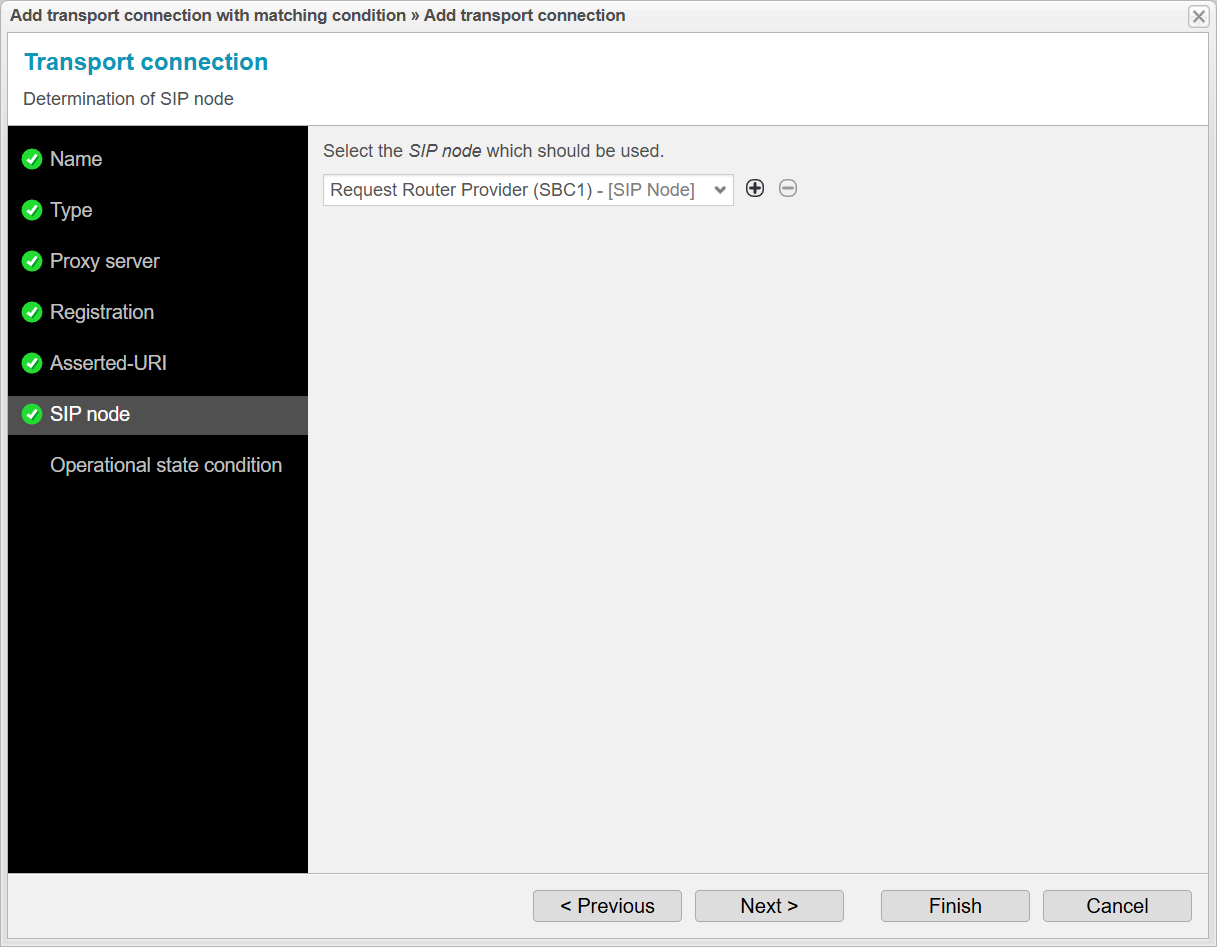
Under SIP Node, select the existing Request Router for the provider, as it will use the new transport connection to also distribute calls to the second target system SBC 2 with Zoom Phone Premise Peering.
-
Click .
The Operational State Condition menu item allows for continuous monitoring of the status of anynode target systems. anynode can determine if a target system is in Maintenance Mode or not. This information is crucial to ensure that SIP messages are only forwarded to functioning target systems. We do not need this feature for our example and can complete the wizard.
-
Click on
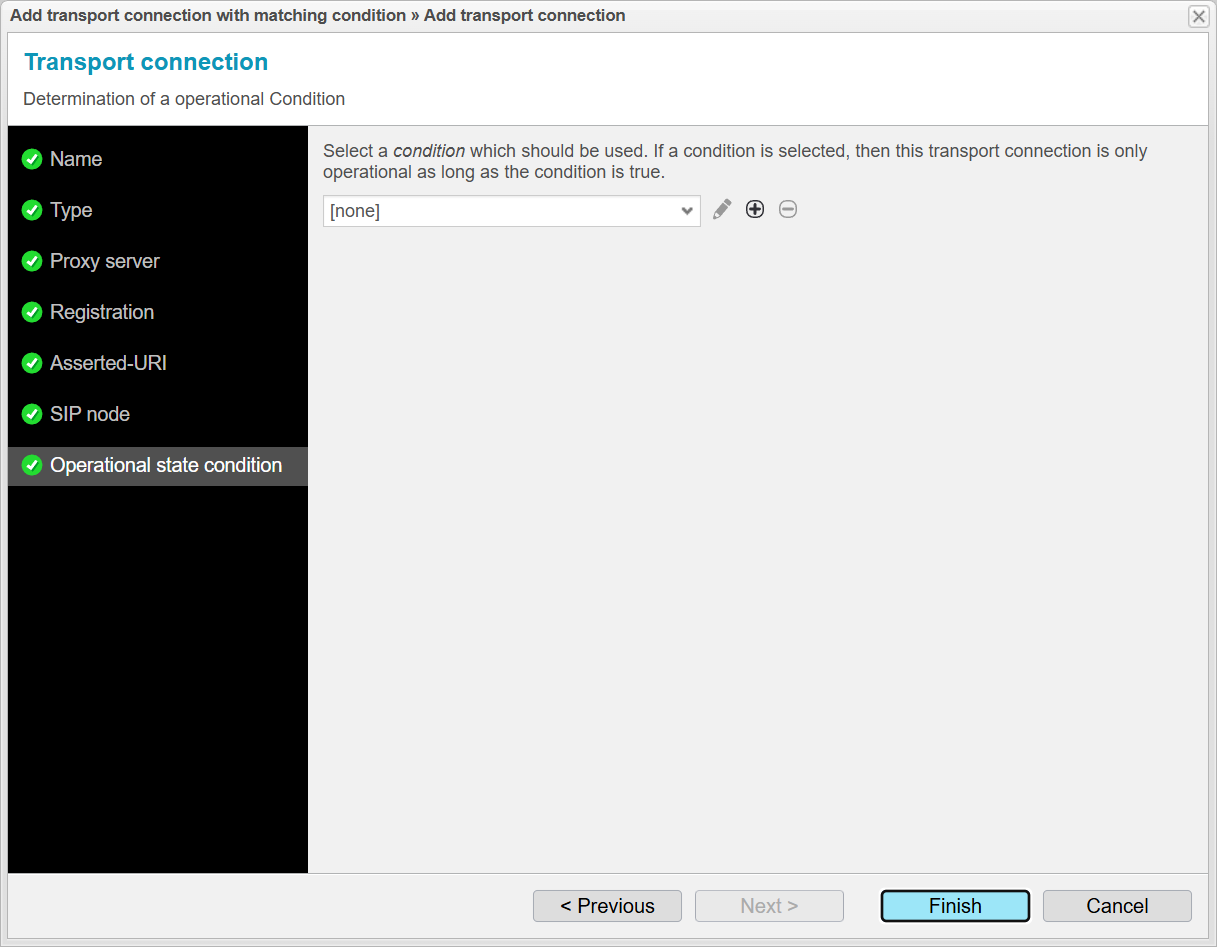
The newly created transport connection is now configured to point to target SBC 2, which is used for Zoom Phone Premise Peering. This ensures that calls identified as Zoom Phone traffic are routed to the correct SBC. In the next step, we will define the filter condition that determines when this transport connection is used.
-
Click to continue.
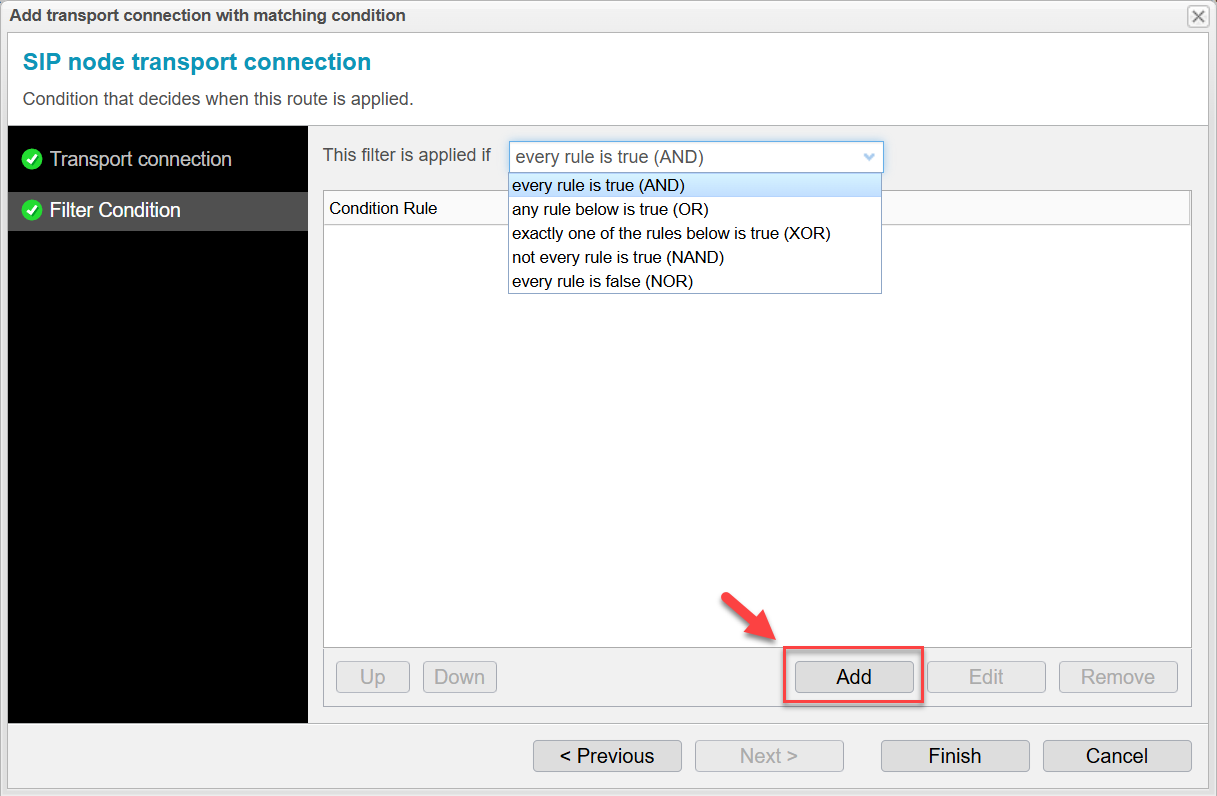
Apply Rules with Filter Condition
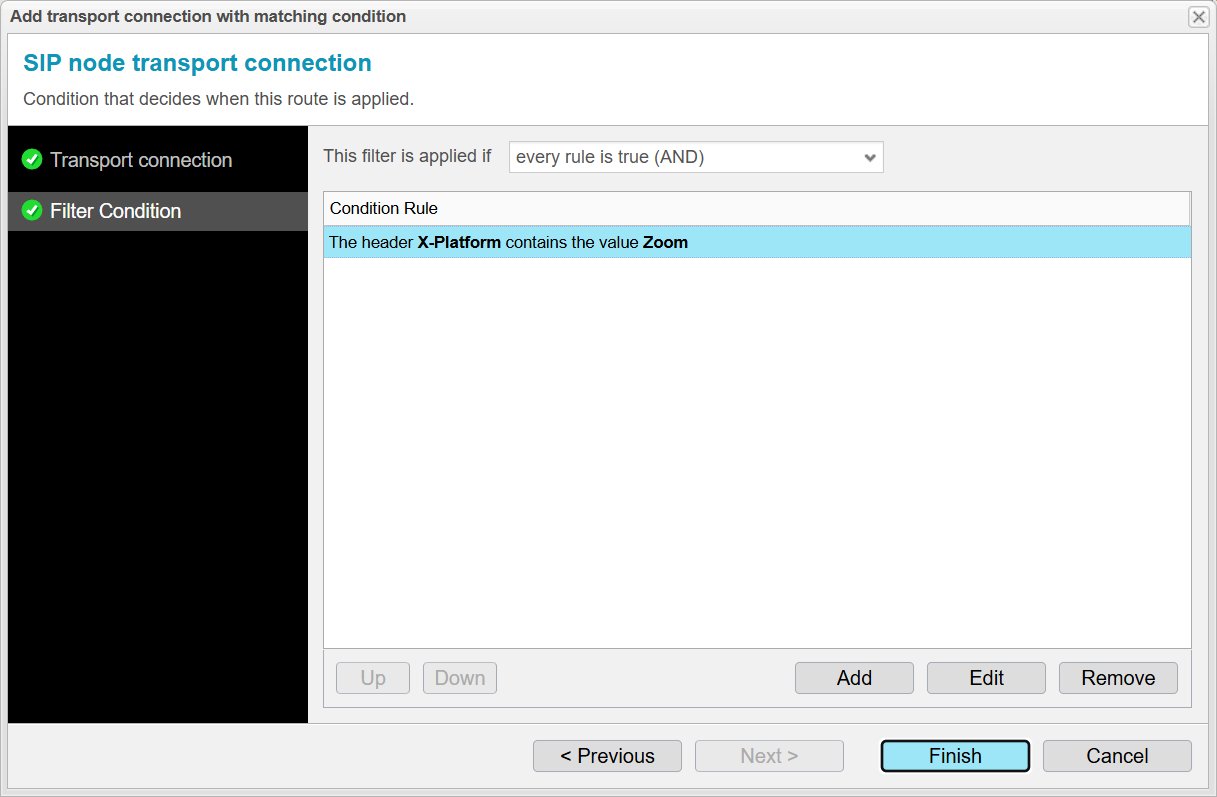
When you configure SIP Header Based Routing in the anynode Request Router, you define one or more rules (e.g. matching SIP headers like From, To, User-Agent, etc.).
The Filter Condition defines how these rules are logically combined to decide when the route is applied. This is standard Boolean logic.
Since there is only one rule in the condition rule list, you can keep the default setting “every rule is true (AND)”.
With a single rule, the AND condition has no additional effect, as the route is applied as soon as that one rule matches.
-
Click on .
-
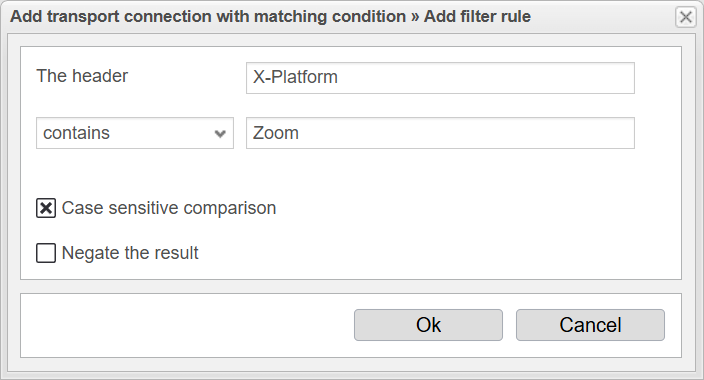
Insert
-
X-Platform -
contains -
Zoom
-
This is the string anynode searches for inside the header value. Combined meaning:
Match if X-Platform contains the substring Zoom.
Case sensitive comparison
When Case sensitive comparison is enabled, letter case matters.
-
Matches
-
X-Platform: Zoom
-
-
Does not match
-
X-Platform: zoom -
X-Platform: ZOOM
-
Recommendation: Only enable this if you are 100% sure the upstream system always uses the same casing.
Negate the result
Inverts the logic of the rule.
If unchecked (current state):
-
Rule is true when
X-Platformcontains Zoom
If checked:
-
Rule is true when
X-Platformdoes NOT contain Zoom
Example use case for negation
-
Route all calls except Zoom calls.
You will get an overview of your configured rule.
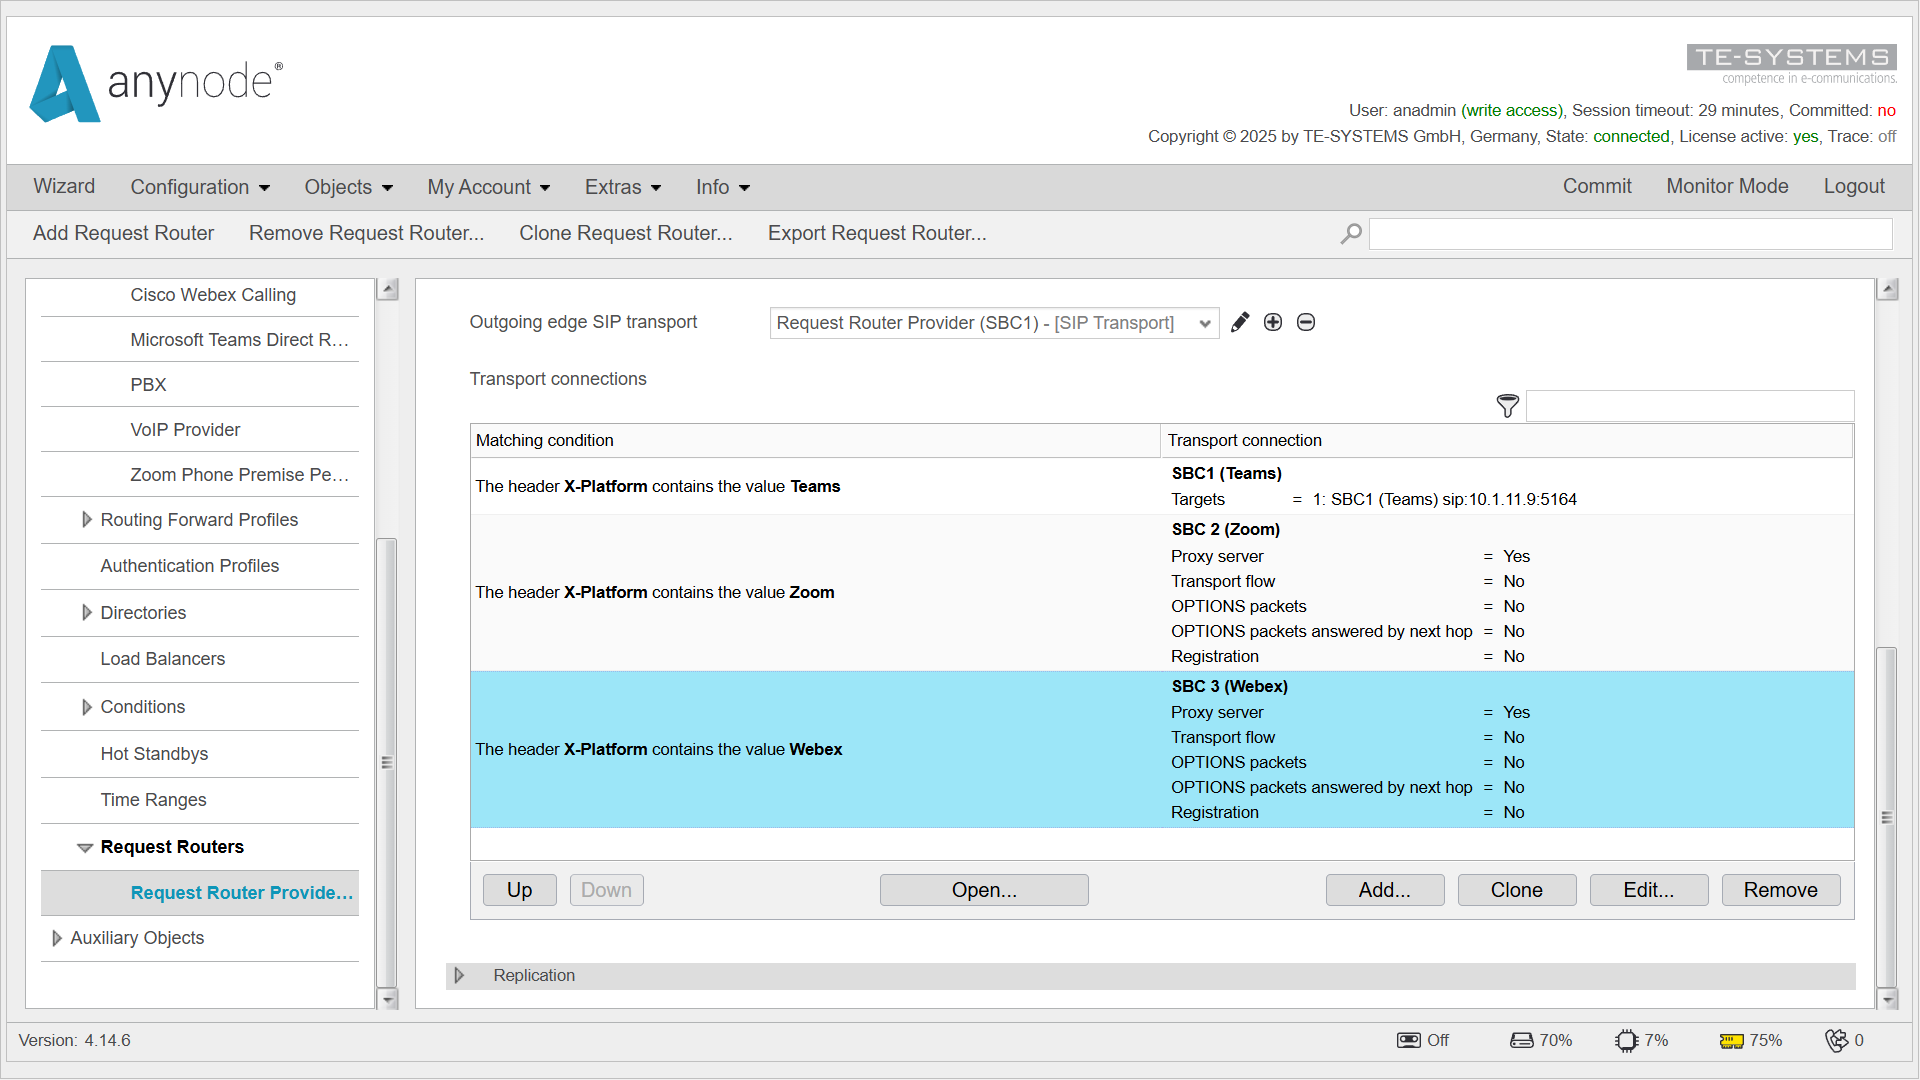
Continue your routing scenario and repeat the steps for Webex.
For Teams, use the existing matching condition and set the filter condition.
-
You will get an overview of your configuration.
Add Fallback Route to SBC for PBX
In our example, we configure a fallback route to the anynode SBC for the PBX that is used when
the X-Platform header is missing.
-
Repeat the steps you already know to add a new matching condition.
-
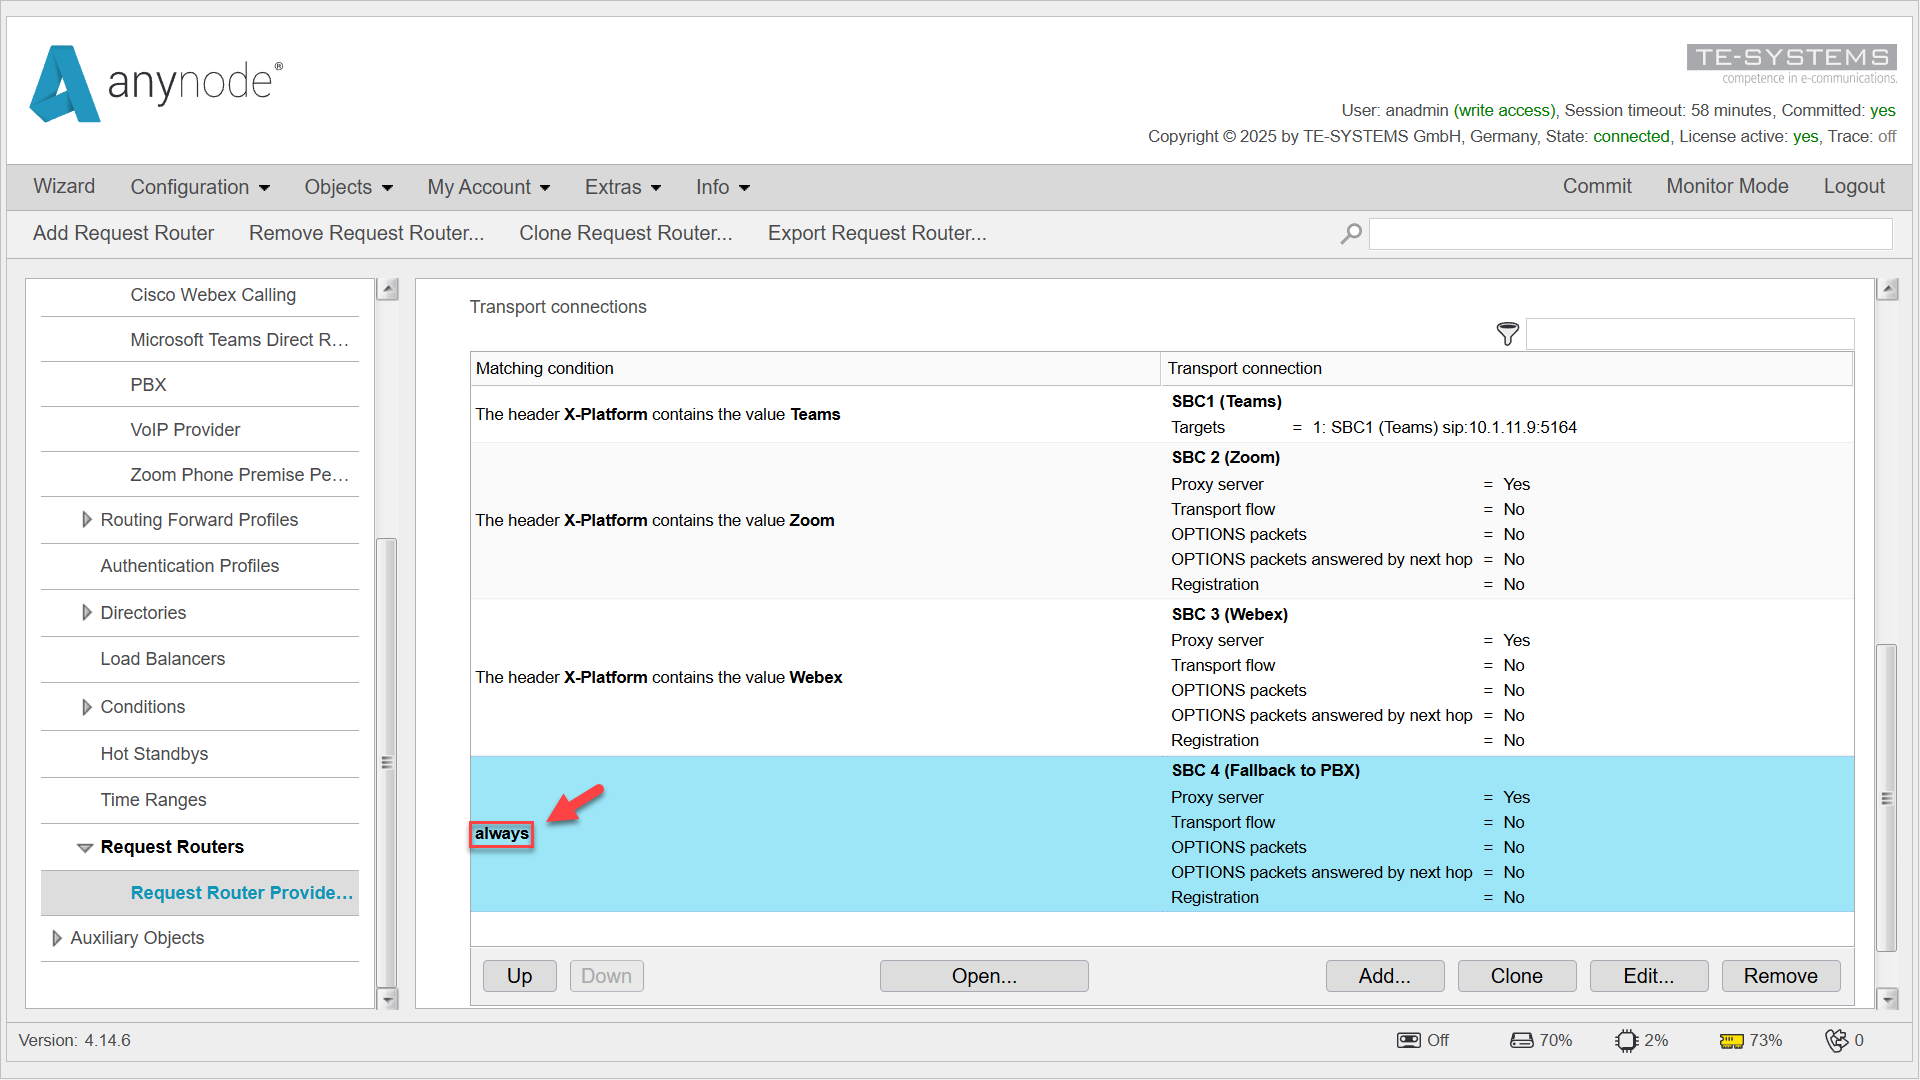
For this route, do not configure a filter condition.
The Request Router Assistant will automatically set the matching condition to always.
The routing table is evaluated from bottom to top.
As a result, the fallback route placed at the end of the routing table will match all remaining calls—but only if none of the routes above it match first.
This ensures that calls without the X-Platform header are reliably routed
to the PBX.
Never place a route with the matching condition always above more specific routes.
Doing so would cause all calls to be routed to the PBX, and the platform-specific routes (Teams, Zoom, Webex) would never be evaluated.
Click to save your configuration.
Congratulations on completing this chapter! You have successfully configured SIP Header Based
Routing using the anynode Request Router. In this chapter, you learned how to route calls based on the X-Platform
header to different target systems, how to define matching conditions, and how to implement a reliable fallback route to
a PBX.
With this setup, you now have a flexible and robust routing configuration that ensures correct call distribution—even when routing information is missing.