
VMware
Considerations for deploying anynode – The Software SBC on a virtual machine using VMware and Microsoft Hyper-V. This guide will not delve into the specific steps for setting up a virtual machine and installing the operating system.
Now, we will guide you on considerations for deploying anynode on a virtual machine using VMware. This guide will not delve into the specific steps for setting up a virtual machine and installing the operating system. Please refer to the respective manufacturer documentation and manuals for comprehensive details on the installation procedures for VMware ESXi Server and virtual machines. Check the advantages of using anynode in a VMware environment:
-
Scalability: VMware provides a flexible and scalable virtualization platform, allowing you to easily scale your anynode deployment based on the changing demands of your communication infrastructure. This scalability ensures that your network can adapt to growth and handle increased traffic efficiently.
-
Resource Optimization: Virtualization with VMware enables efficient resource utilization by consolidating multiple virtual machines on a single physical server. anynode benefits from this resource optimization, ensuring optimal performance while minimizing hardware requirements, reducing costs, and promoting energy efficiency.
-
Isolation and Security: VMware's robust virtualization architecture ensures isolation between virtual machines. By deploying anynode within this secure environment, you enhance the overall security of your communication network. The isolation prevents potential threats from affecting the entire system and allows for controlled access to anynode resources.
-
Flexible Networking: VMware provides a range of networking options, including the ability to configure virtual networks, assign dedicated IP addresses, and manage network traffic. This flexibility aligns with anynode's capability to adapt to different network architectures, ensuring seamless integration with your existing infrastructure.
To ensure seamless operation without disruptions often associated with shared hardware resources, the resource management of the VMware ESXi Server will be fine-tuned. This adjustment aims to reserve ample system resources exclusively for anynode. It is presumed that the underlying hardware supporting the VMware ESXi Server and the relevant software installations—including the VMware ESXi Server and guest operating systems—are already in place.
Using the latest VMware ESXi server version is recommended.
Suggested Machine Specifications
Using suggested machine specifications when creating a VM with anynode ensures that the VM has adequate resources (such as CPU, memory, and storage) to perform efficiently without experiencing performance bottlenecks or slowdowns.
In our anynode Performance TechNote, we've put together some tips for using anynode efficiently based on the number of sessions and your choice of the operating system.
By adhering to suggested specifications, you reduce the risk of instability and ensure a more reliable computing environment for your anynode.
Virtual Hardware Settings
For optimal operation of anynode on VMware, we recommend the following settings in the virtual hardware:
Adjust the latency sensitivity of your virtual machine to minimize scheduling delays, particularly beneficial for latency-sensitive applications like anynode.
In the upper menu of your ESXi Host Client, click on the button to edit your settings of the virtual machine.
Click on the button.
Open the Advanced register.
Navigate to Latency Sensitivity. Select High from the drop-down menu.
Click on the button.

Selecting High for Latency Sensitivity mandates a 100% memory reservation. Contemplate reserving CPU to guarantee exclusive access, thereby minimizing CPU halt/wake-up states.
Click on the button.
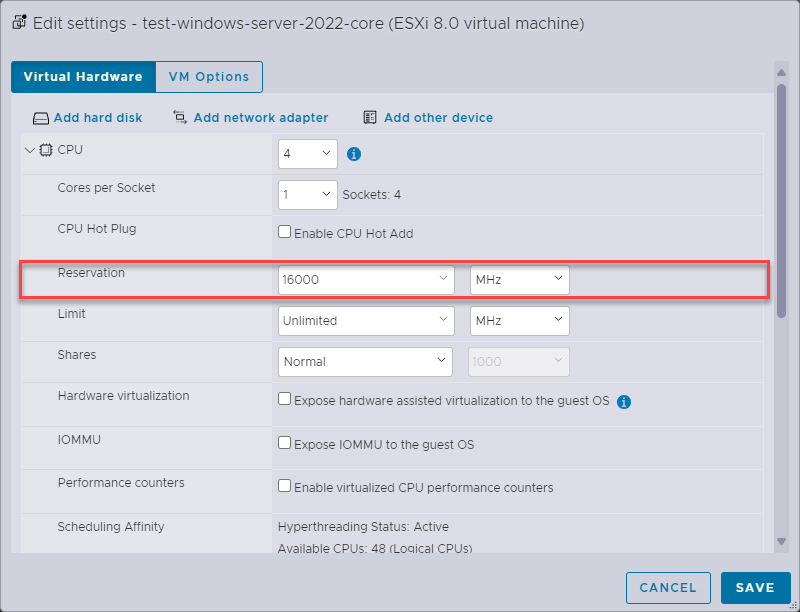
Open the register CPU.
Go to Reservation and set to the number of CPUs multiplied by the clock speed.
For example, if the clock speed is 4000 MHz and 4 CPUs are assigned to the VM, reserve 16000 MHz.
In VMware ESXi, CPU reservation refers to the minimum amount of CPU resources that are guaranteed to a virtual machine regardless of the overall system load. When you set a CPU reservation for a VM, ESXi ensures that the specified amount of CPU capacity is always available for that VM to use. This means that even if the physical host is under heavy CPU load, the reserved CPU resources will be allocated to the specified VM.
Further details on minimum hardware specifications can be found in our anynode Performance TechNote
Click on the button.
Please note that if the number of physical CPUs in the host exceeds the allocated virtual CPUs detected by the VMware ESX Server, no CPU affinity needs to be assigned.
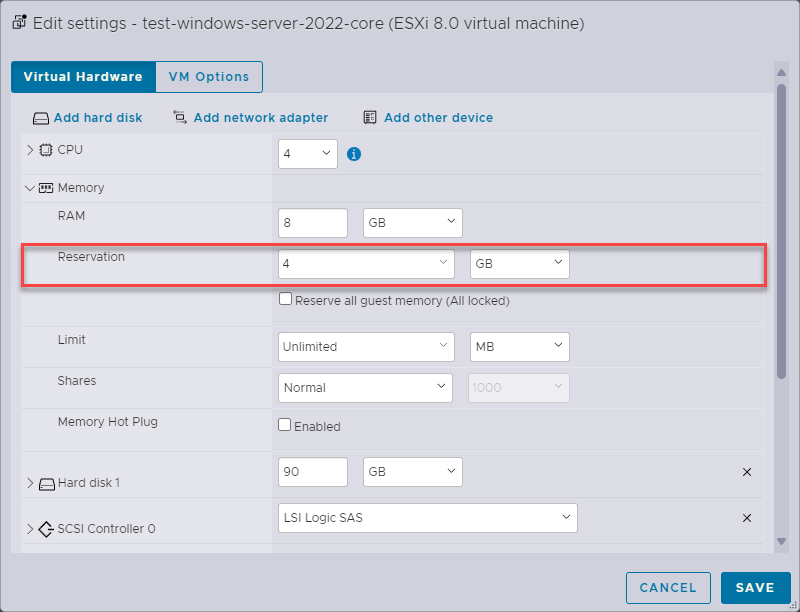
Setting memory reservation for a virtual machine ensures that a specific amount of physical memory is reserved exclusively for that VM, guaranteeing that the VM always has access to its allocated memory regardless of the overall system load.
Open the register Memory.
Typically, you would reserve a significant portion of memory for the VM running anynode, potentially allocating several gigabytes or more depending on the scale of your deployment.
Set Reservation to 4 GB.
Further details on minimum hardware specifications can be found in our anynode Performance TechNote.
Click on the button.
Further Recommendations for VMware Environments
Note that VMware snapshots have a substantial impact on performance, potentially disrupting the real-time behavior of media (audio) streams in a virtual environment.
VMware strongly advises against running snapshots in production on a permanent basis for virtual machines. Consequently, it is assumed that snapshots will not be utilized on the guest systems.
For more details review the VMware knowledge base entry Best practices for using VMware snapshots in the vSphere environment (1025279).
Also review the KB entry Troubleshooting virtual machine performance issues for VMs running on VMware Workstation, ACE, Player, or Server (1008360) for additional information.
Take note of the following requirements for VMware environments:
-
No VMware Snapshots utilization.
-
Disabling of the Power Management in the host BIOS and vSphere
-
Enabling High Latency Sensitivity
Further information based on various VMware releases can be found in the following documents:
Performance Best Practices for VMware vSphere 8.0,
Host Power Management in VMware vSphere 7.0
Media and Entertainment Workloads on vSphere 6.7
Best Practices for Performance Tuning of Latency-Sensitive Workloads in vSphere VMs
Deploying Extremely Latency-Sensitive Applications in VMware vSphere 5.5
Windows Server 2022 Core Installation
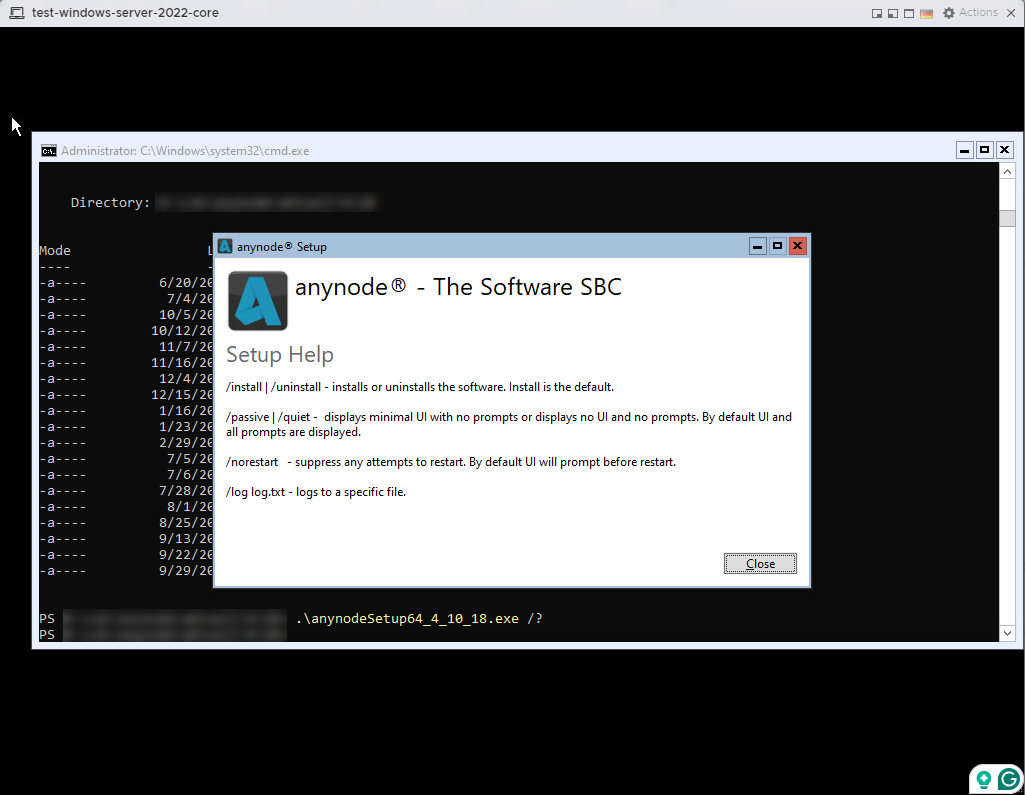
If you are using the Core edition of Windows Server, you won't have a traditional desktop environment. Instead, you'll work with the command-line interface.
Once the installation files are available on the Windows Server 2022 Core virtual machine, you can install the software from the command line. Use the appropriate commands provided by the anynode installer.
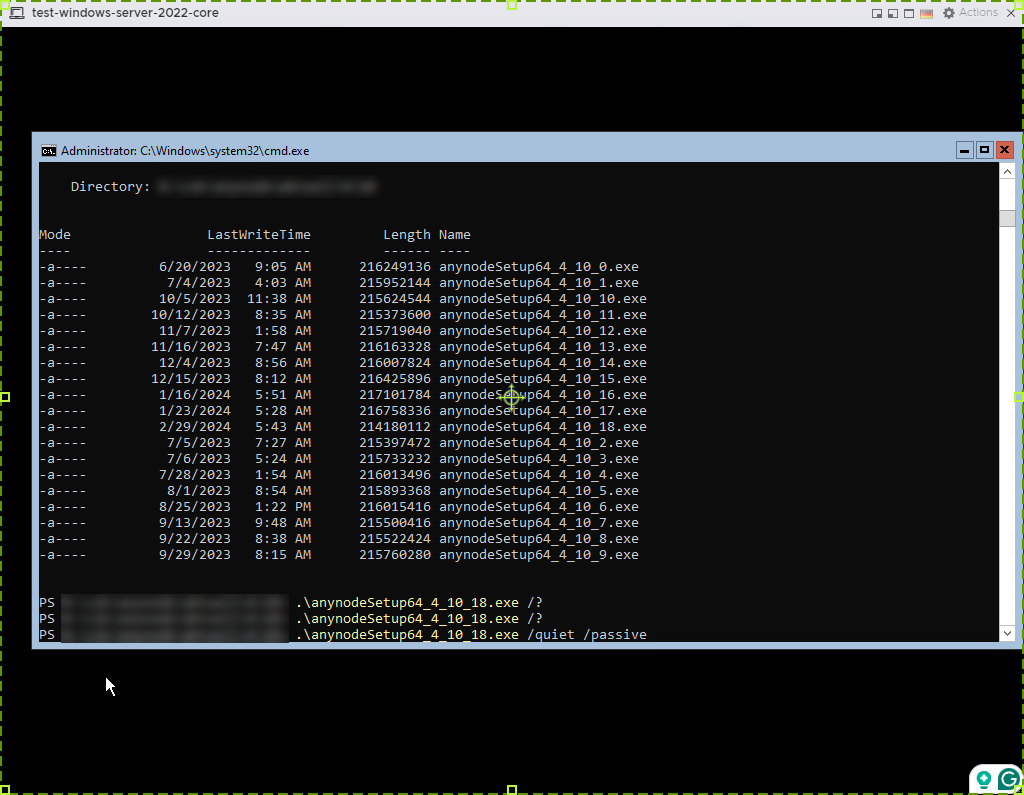
For anynode version 4.10.18 for example, use .\anynodeSetup64_4_10_18.exe /? for an overview of the prompts.
Combining both /quiet and /passive options in a command line during anynode installation ensures
a silent and non-interactive installation process. This is particularly useful for deploying anynode across multiple systems
in a network environment, where manual intervention for each installation is impractical or unnecessary. Here is an example
for anynode version 4.10.18:
anynode License and MAC Address Binding
A license key is typically tied to the unique MAC addresses of a network interface. To ensure the validity of an anynode license, it's crucial to avoid making MAC address changes after the license request. This includes scenarios such as virtual machine movements. If a change in the MAC address (referred to as "System ID") occurs, the license becomes invalid.
During the first reboot after a MAC address change, you will be prompted to select a new identifier. It is imperative to choose the option "Keep its old identifier" without exception. Opting to create a new identifier ("Create") will alter the virtual machine's MAC address, rendering the anynode license invalid.
When prompted by the ESXi server with the question "Did you move this virtual machine, or did you copy it?", it is imperative to consistently confirm with "I moved it." If, during this process, a new "identifier" is generated using the "Create" option, the virtual machine's MAC address will be altered, resulting in the invalidation of anynode's license.
To proactively prevent such issues, it is recommended to assign a fixed MAC address to the virtual machine before anynode installation. Set the MAC address to 00:50:56:XX:YY:ZZ, where the variables XX, YY, and ZZ can take values within the ranges XX:
00h – 3Fh, YY: 00h – FFh, ZZ: 00h – FFh.
In scenarios where the virtual machine needs to be relocated post anynode installation, the MAC address can be reverted to the manually defined values. This ensures the continued use of the original anynode license without any complications.
Our sales team is ready to assist you with any inquiries regarding your license. Feel free to reach out to us.
More information can be found in the VMware knowledgebase entry: Changing the MAC address of a hosted virtual machine (507)
Congratulations. You have now familiarized yourself with the essential settings for a successful deployment of anynode under VMware.