Add Remote Backend Instance on Primary System

This subchapter focuses entirely on the configuration that is carried out on the Master System (SBC1).

In the upcoming steps, we will import the replica.xzbackend file from the previous chapter. To begin, open the frontend of the primary anynode. In our case, this is accessed via the Web Connector established during installation. For more information on accessing the frontend, refer to the Installation and Maintenance Technote.

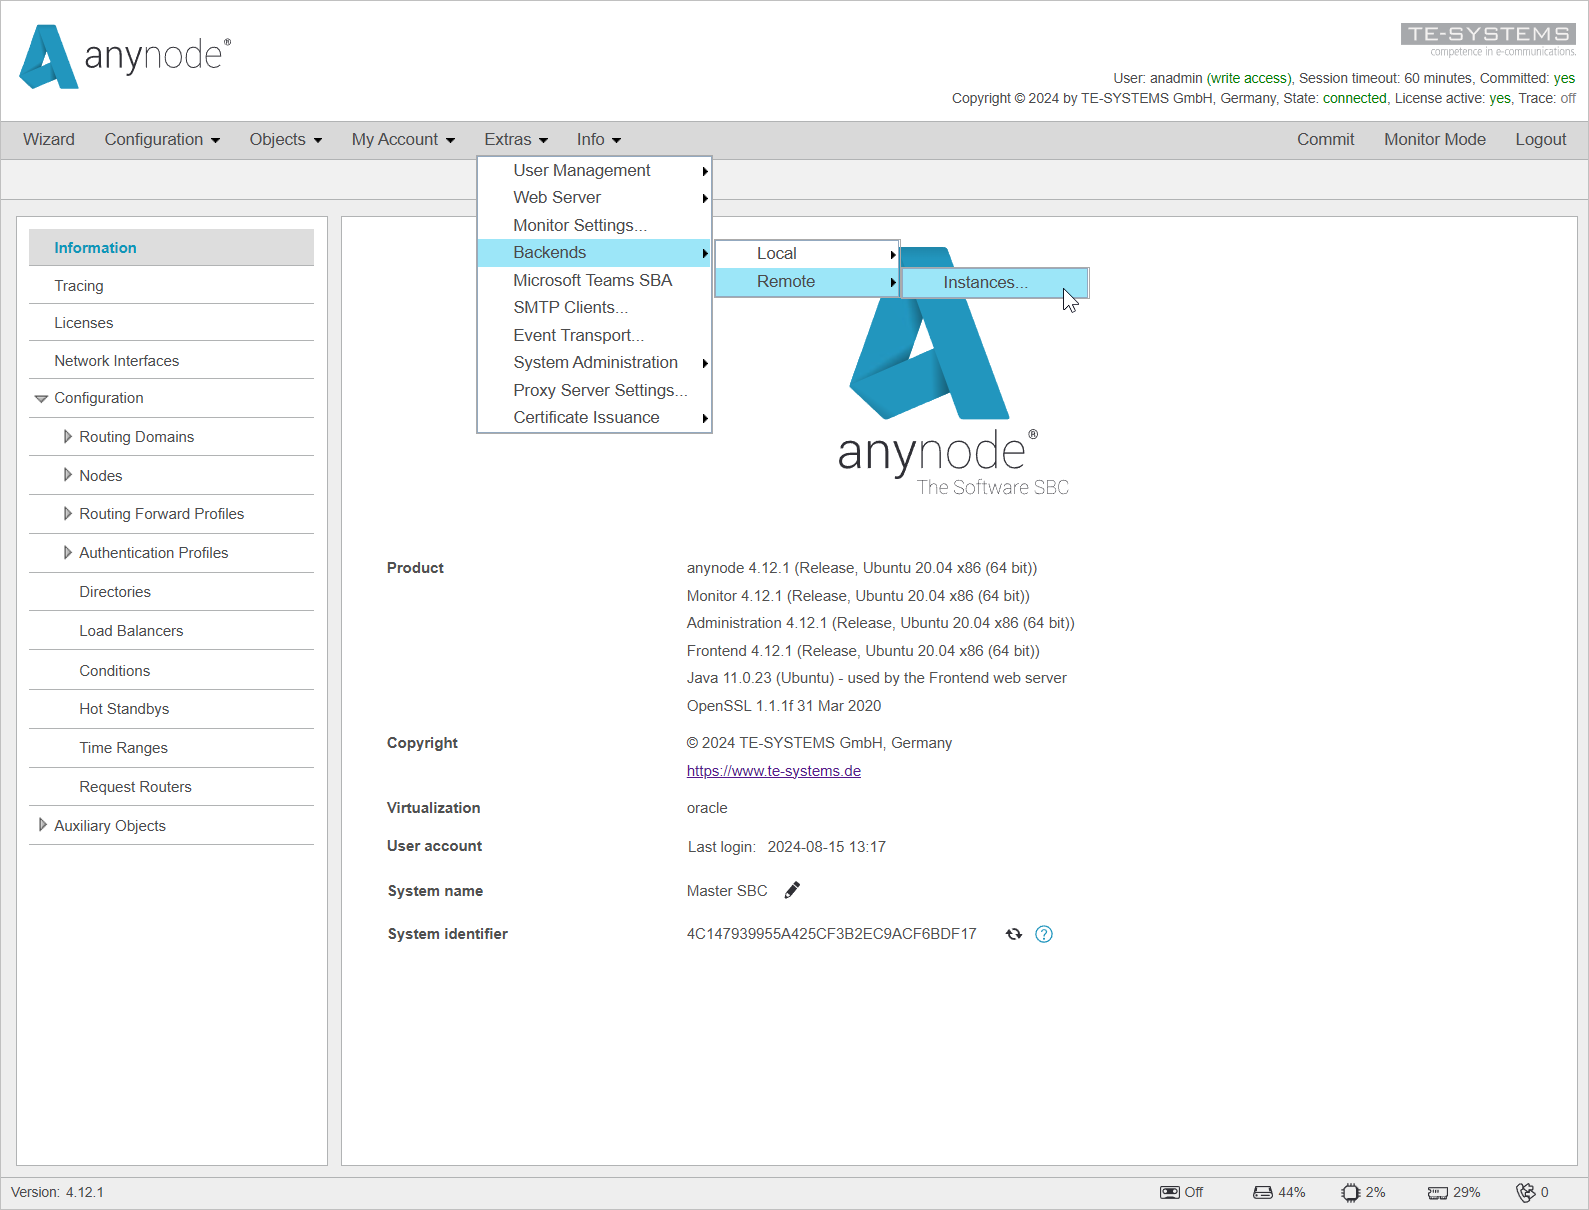
To import the Remote Instance, navigate to Extras > Backends > Remote, and select instances .

Screenshot: anynode frontend navigating through extras menu to open remote instances Screenshot: anynode frontend navigating through extras menu to open remote instances
anynode frontend navigating through extras menu to open remote instances

Backend List

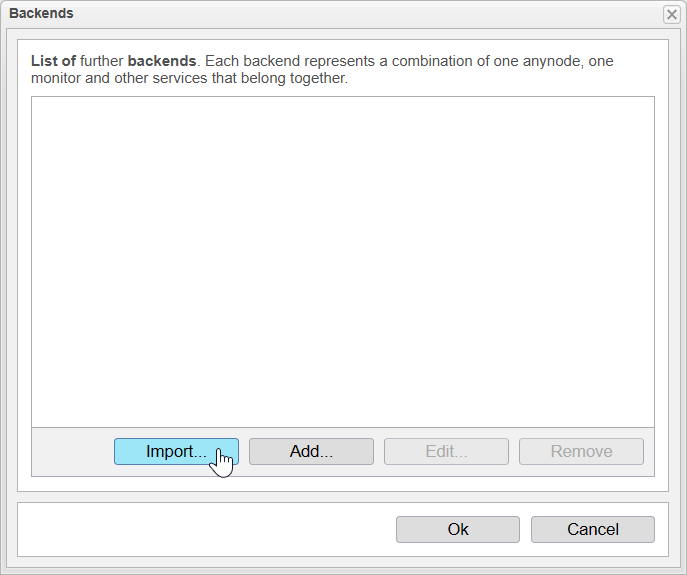
A list of all configured Remote Backends will now open. Since we have not imported any yet, there will be no entries.

By clicking on Import , we will enter the assistant for importing the replica.xzbackend file.

Screenshot: anynode – The Software SBC frontend with list of further backends and import function. Screenshot: anynode – The Software SBC frontend with list of further backends and import function.
anynode – The Software SBC frontend with list of further backends and import function.

By clicking on Choose File , a file manager window will open, which varies depending on the operating system used to access the frontend.
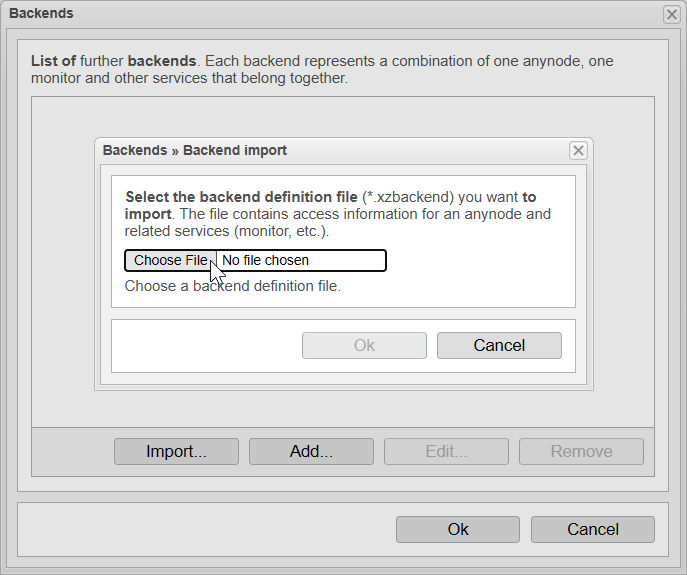
Screenshot: anynode – The Software SBC frontend with backend import function and selection of the backend definition file. Screenshot: anynode – The Software SBC frontend with backend import function and selection of the backend definition file.
anynode – The Software SBC frontend with backend import function and selection of the backend definition file.

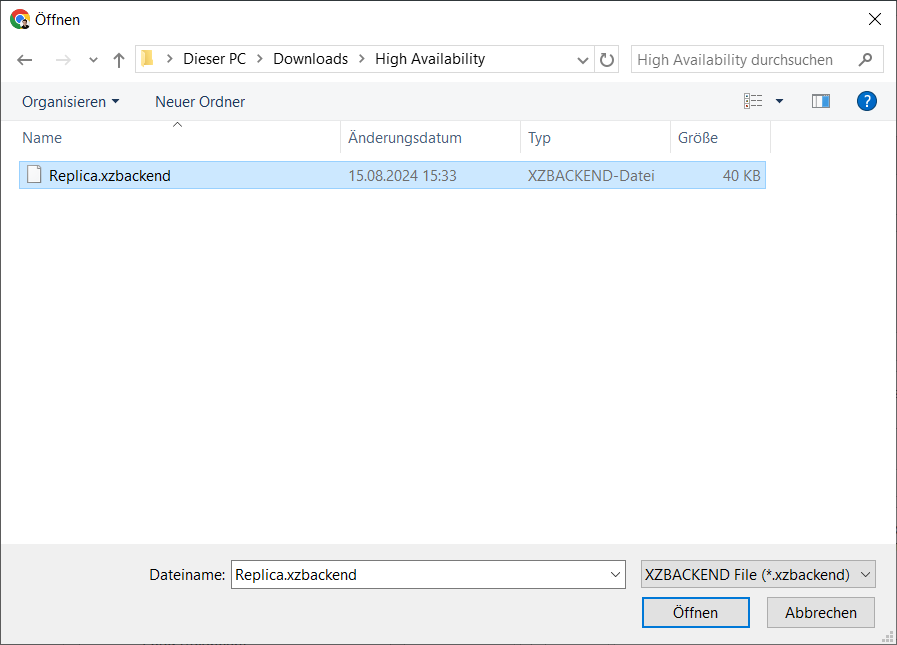
In our case, we are accessing the frontend using a Windows device. You will need to navigate to and select the Replica.xzbackend file.

Screenshot: browser window with selected backend definition file for upload in anynode – The Software SBC. Screenshot: browser window with selected backend definition file for upload in anynode – The Software SBC.
Browser window with selected backend definition file for upload in anynode – The Software SBC.

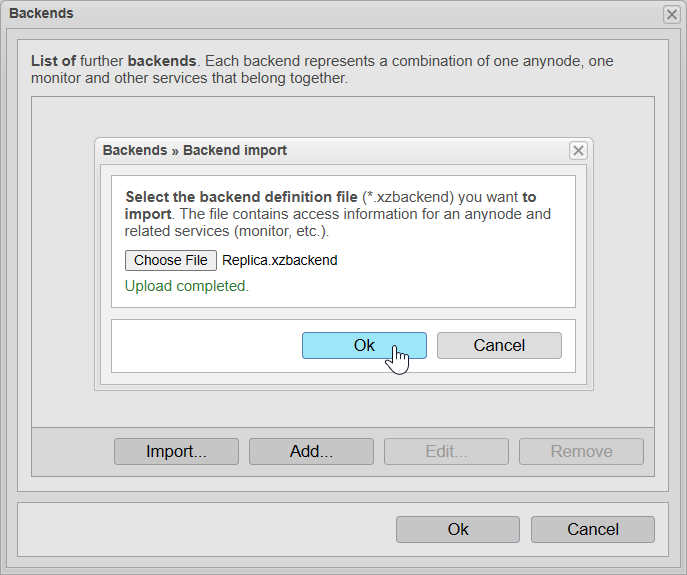
Once the replica.xzbackend file is selected and the upload is complete, the green text Upload completed will appear.

Click Ok to confirm the import of the file.

Screenshot: anynode – The Software SBC frontend with backend import function and complete upload of the backend definition file. Screenshot: anynode – The Software SBC frontend with backend import function and complete upload of the backend definition file.
anynode – The Software SBC frontend with backend import function and complete upload of the backend definition file.

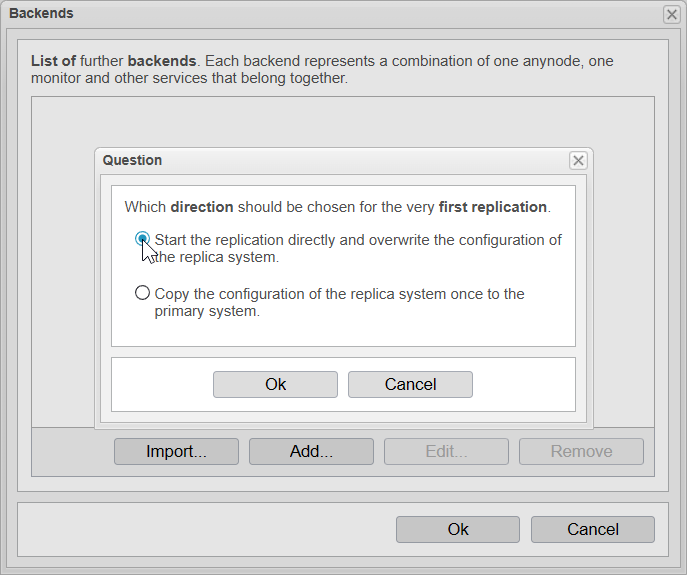
The Master anynode now establishes a connection to the Standby anynode. Once this connection is successfully established, a window will appear offering two options:

  • Start the replication directly and overwrite the configuration of the replica system. This option will immediately begin replication and overwrite any existing configuration on the replica system.

  • Copy the configuration of the replica system once to the primary system before starting the replication. This option is useful if there is already a configuration on the Replica System that you wish to use.

In our case, we will select the first option.

Click Ok to confirm your choice.

Screenshot: anynode – The Software SBC frontend with backend import function and question which direction should be chosen for the very first replication. Screenshot: anynode – The Software SBC frontend with backend import function and question which direction should be chosen for the very first replication.
anynode – The Software SBC frontend with backend import function and question which direction should be chosen for the very first replication.

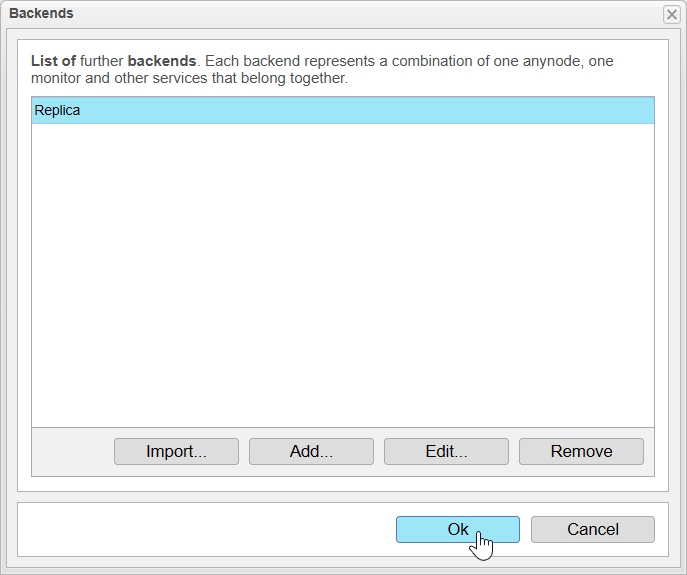
The imported backend will now be displayed in the list of Remote Backends.

By confirming with a click on Ok, the replication will now be started.

Screenshot: anynode – The Software SBC frontend with list of imported backends. Screenshot: anynode – The Software SBC frontend with list of imported backends.
anynode – The Software SBC frontend with list of imported backends.

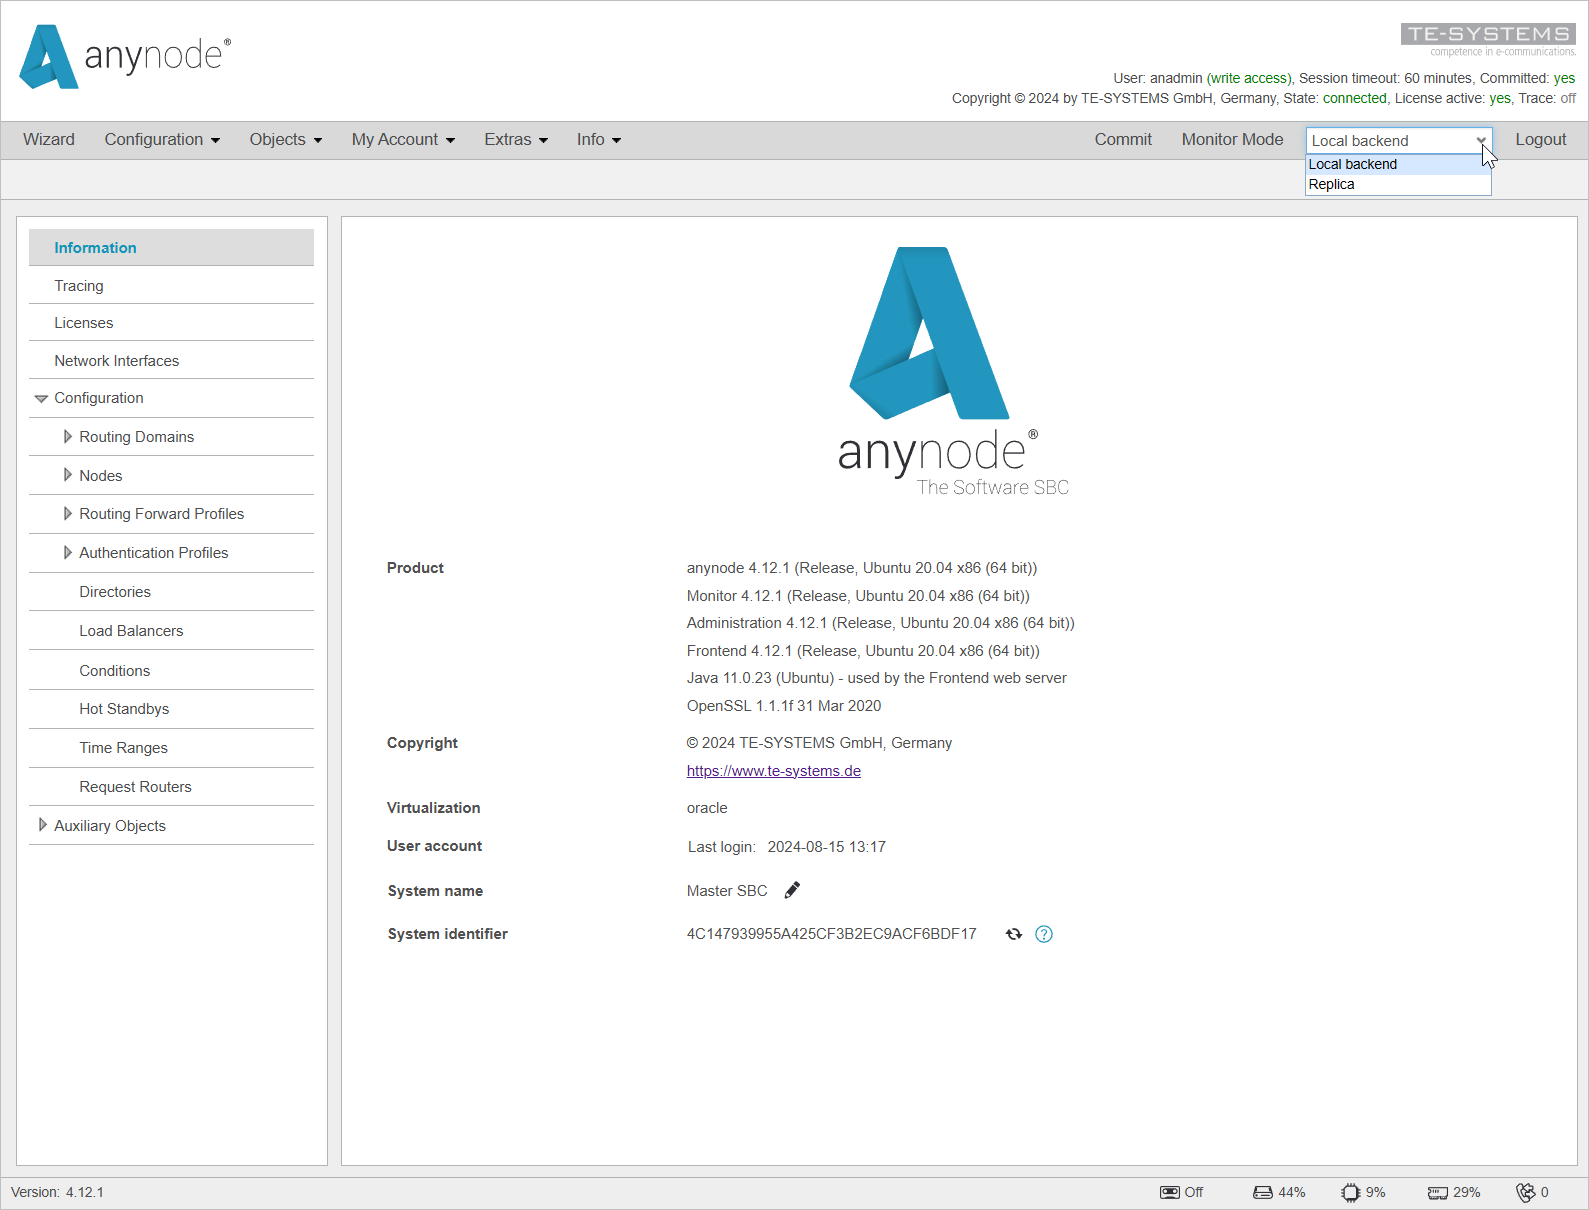
A menu now appears in the upper right corner, which allows switching between the two anynode instances. Since we are using replication, the other anynode is in Read-Only mode, meaning you can only make settings in the areas in the left menu tree above Configuration.

More on this will be covered in the following chapters.
Screenshot: anynode – The Software SBC frontend main view with combo box that allows switching between the two anynode instances. Screenshot: anynode – The Software SBC frontend main view with combo box that allows switching between the two anynode instances.
anynode – The Software SBC frontend main view with combo box that allows switching between the two anynode instances.