Configuration steps on Local Backend
A Floating IP address must be configured on all anynode instances that intend to use it.
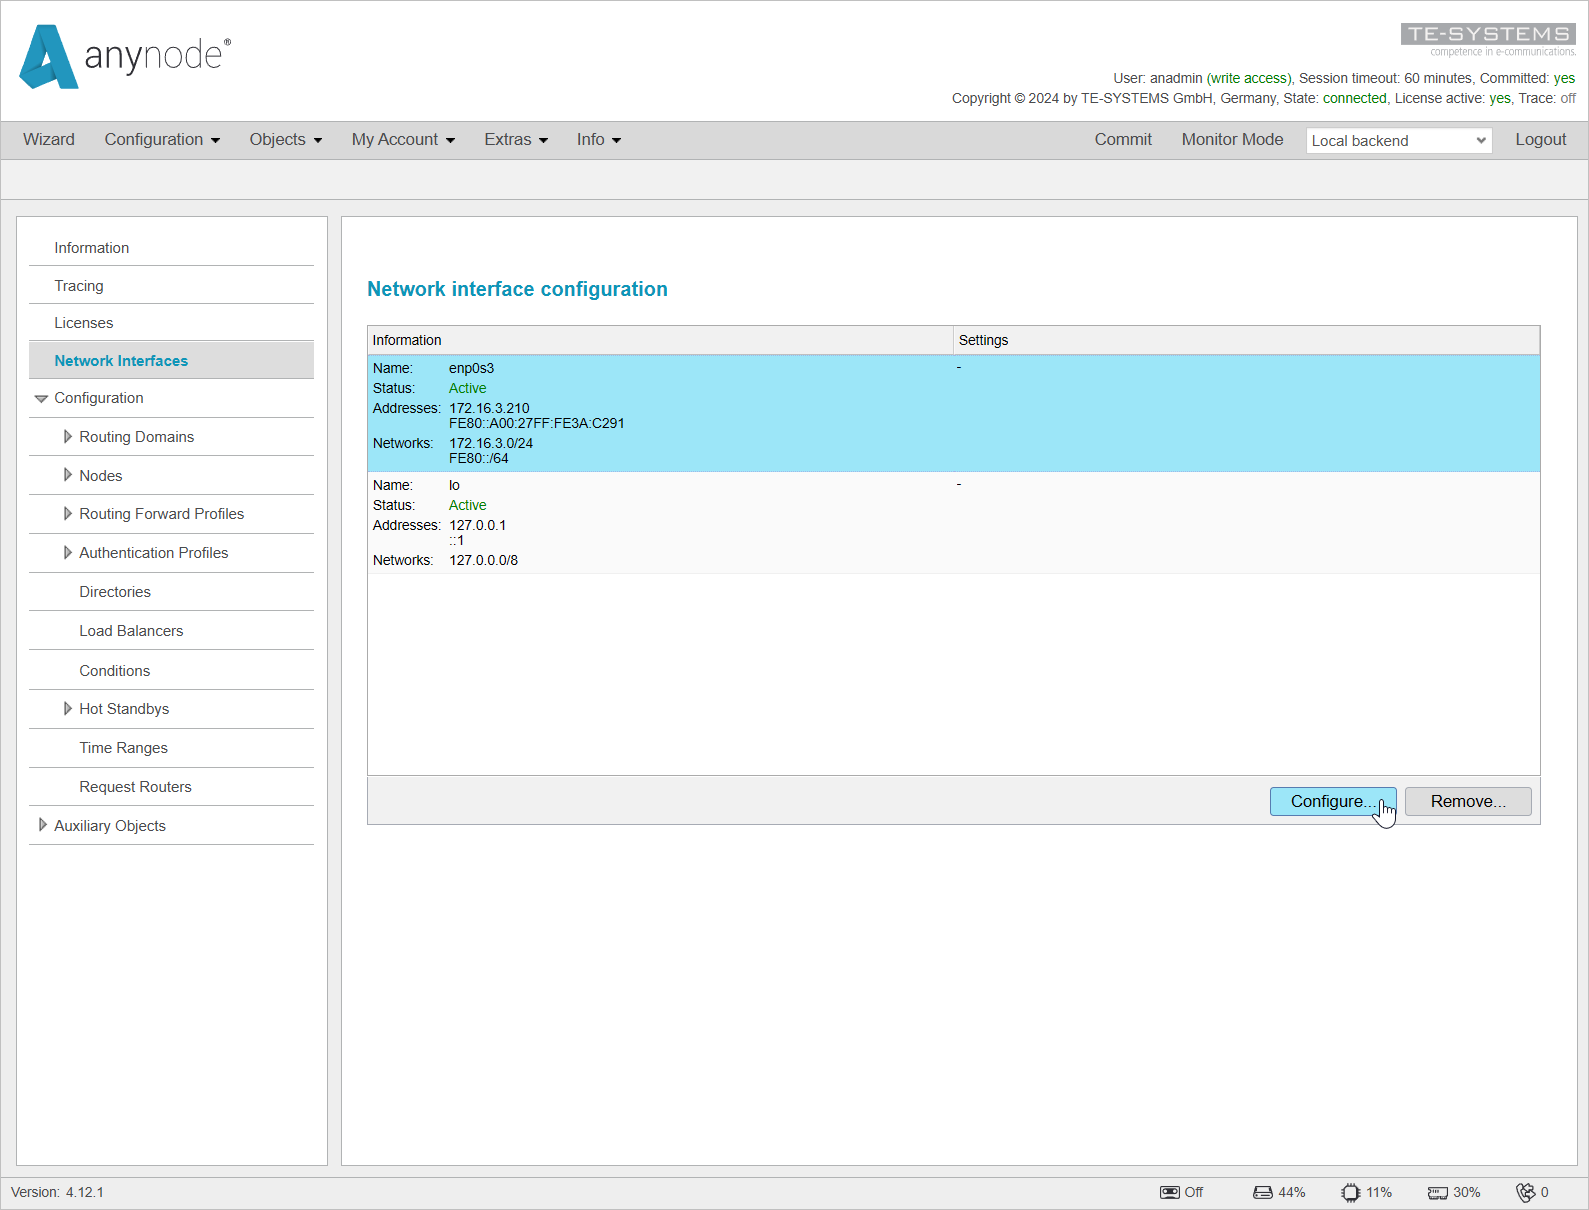
First, navigate to Network Interfaces in the Local Backend.
Select the interface where the Floating IP address should be configured. In this instance, it is the interface named enp0s3. Note that the name of the interface may vary depending on the operating system.
Click on to open the configuration window for the interface.


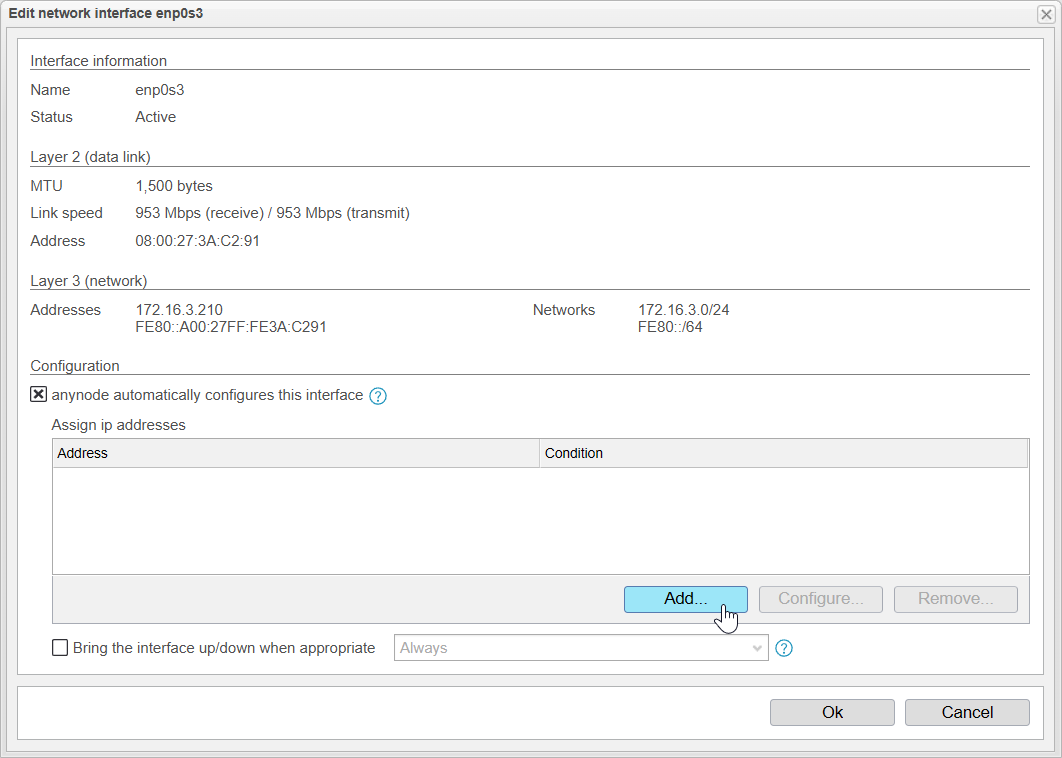
In the configuration window, select the option anynode automatically configures this interface,
and then click on to allow anynode to assign an additional IP address to the interface.
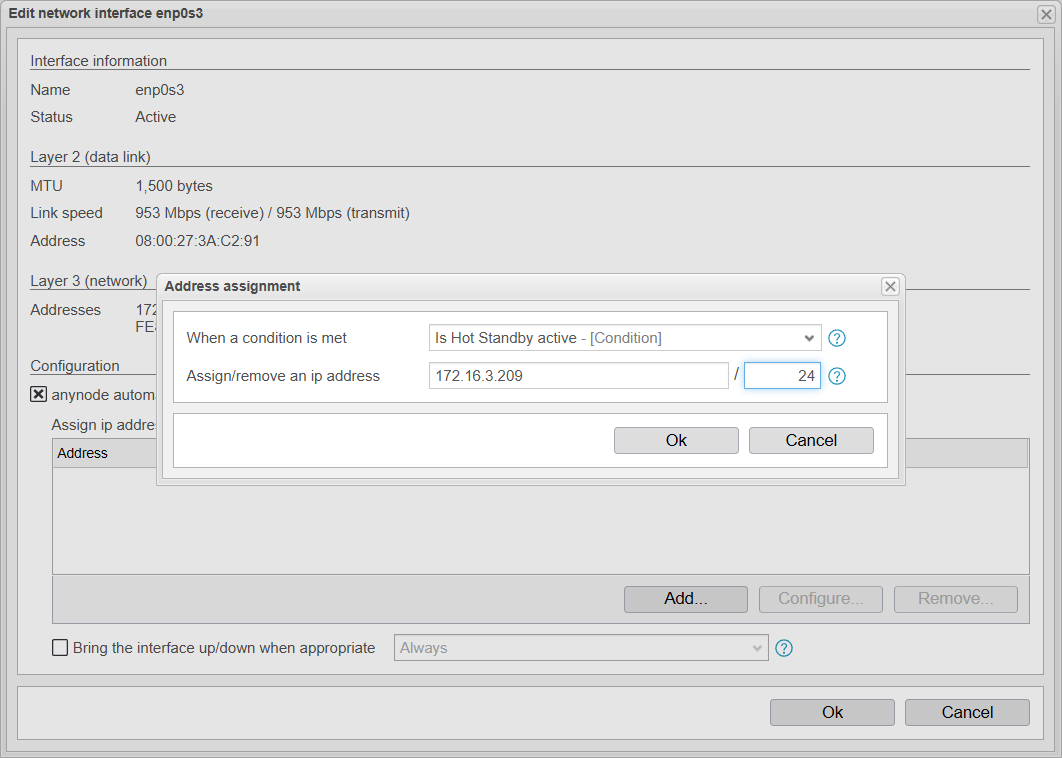
Now, enter the Floating IP address along with the corresponding subnet mask, which in this case is 172.16.3.209/24.
Additionally, select the condition , which was created during the Hot Standby setup. This is important to ensure that the IP is automatically assigned only to the active system.
Confirm the configuration by clicking , and then click on the button below to finalize the settings.
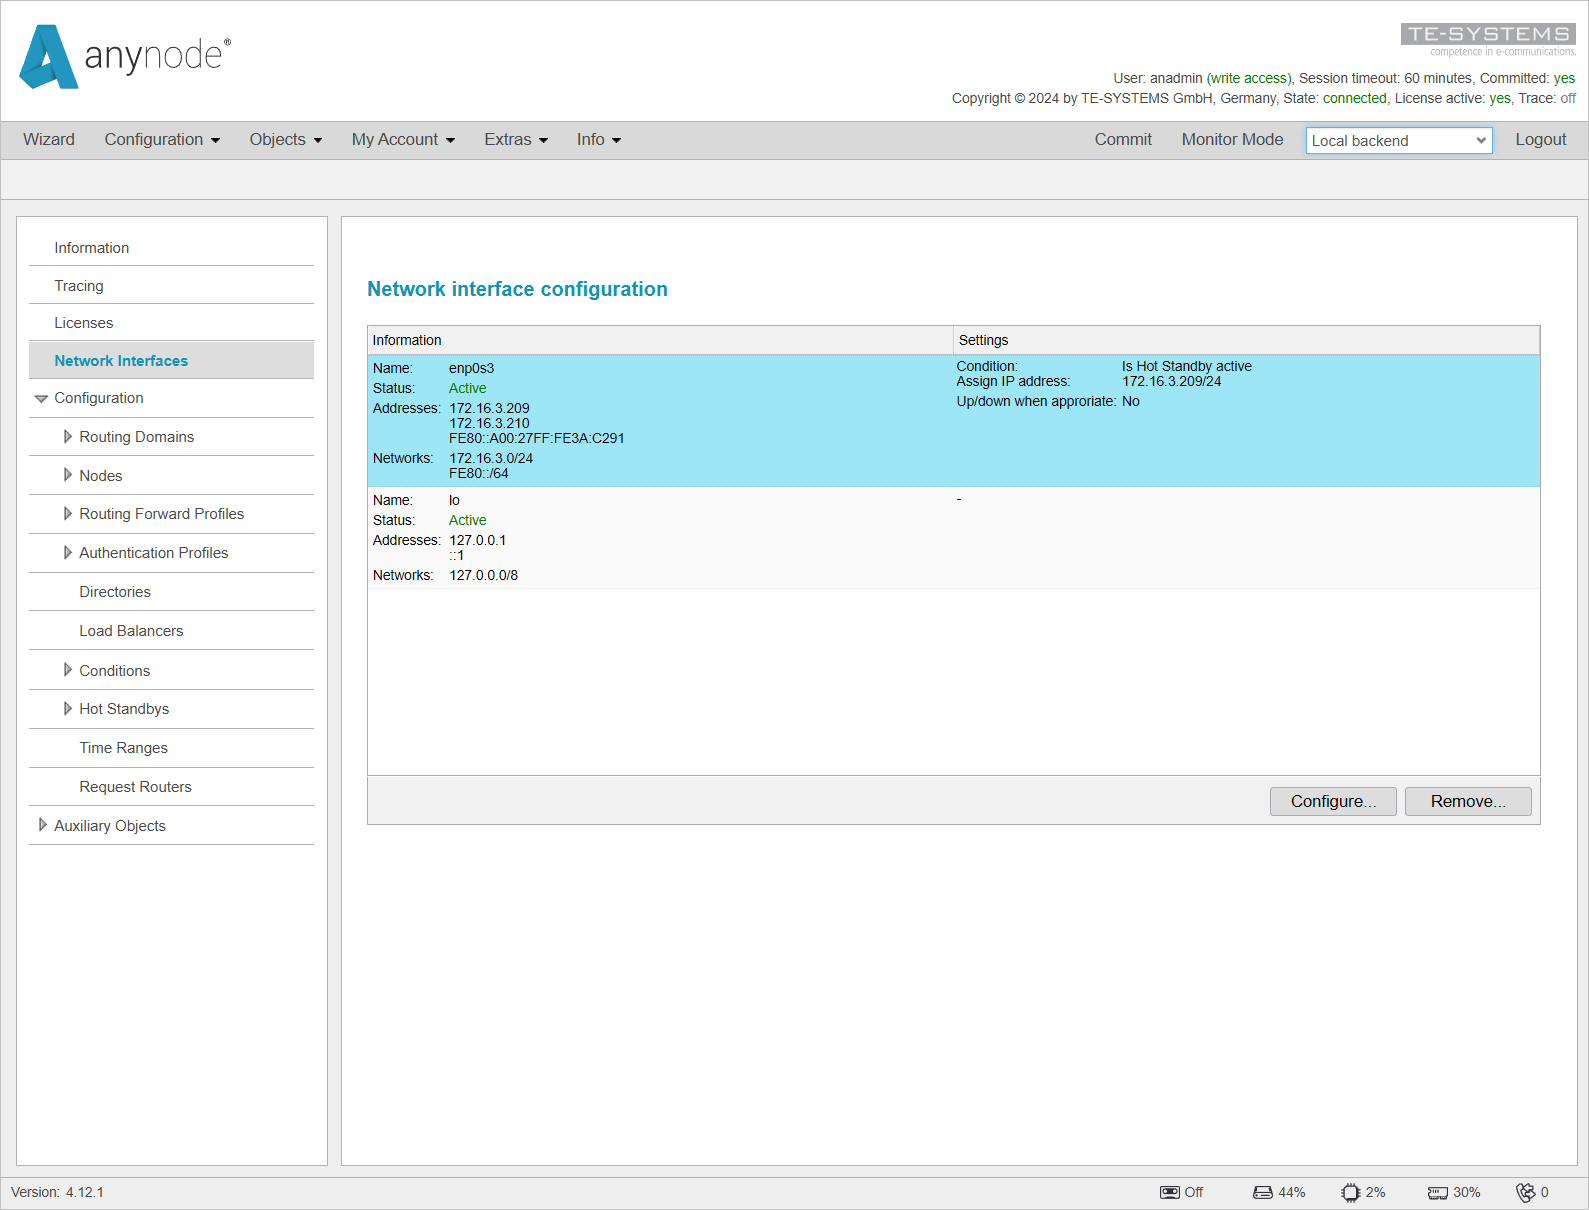
In the Settings section on the right, you can now see how an IP address is assigned with a condition as a dependency.
Since the Main System is currently the active system, the address is directly assigned to it.
In the Network Interfaces under the Information section for the interface, you can see two IP addresses listed:
the previously existing 172.16.3.210 and the 172.16.3.209 assigned by anynode.


