
Restore Backup
This chapter describes the critical role of regular backups and the key steps in the restoration process.We will also delve into the procedures and considerations involved in restoring data on a hot standby system.
By following these guidelines, users can confidently navigate the restoration process, safeguarding the integrity of their communication infrastructure.
Starting with a single anynode instance we will explain with a step-by-step instruction how to bring your anynode back to work.
To fully restore an anynode system, you should check if you have write access in the anynode frontend.
If not, click on Configuration and Take Control in the upper menu.
Navigate to Configuration in the upper menu and choose Restore.
Do not use the Configuration Import Assistant!
Click on the button.
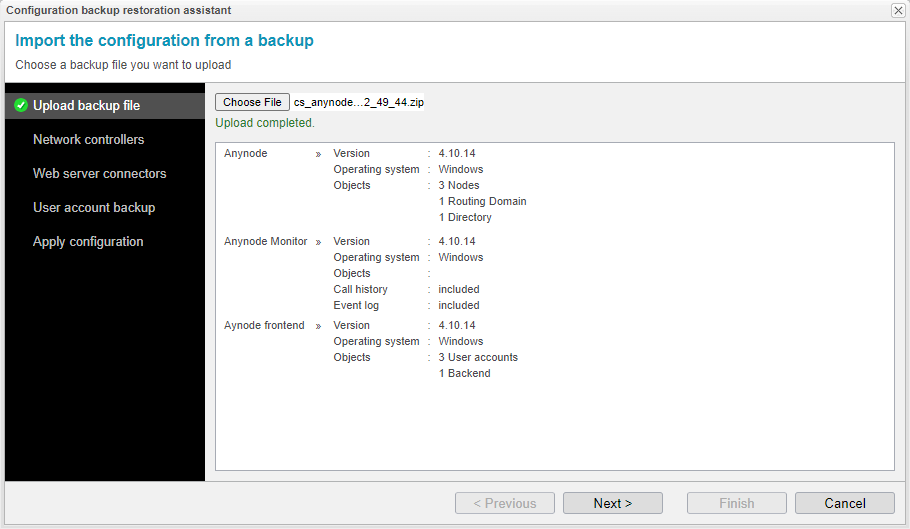
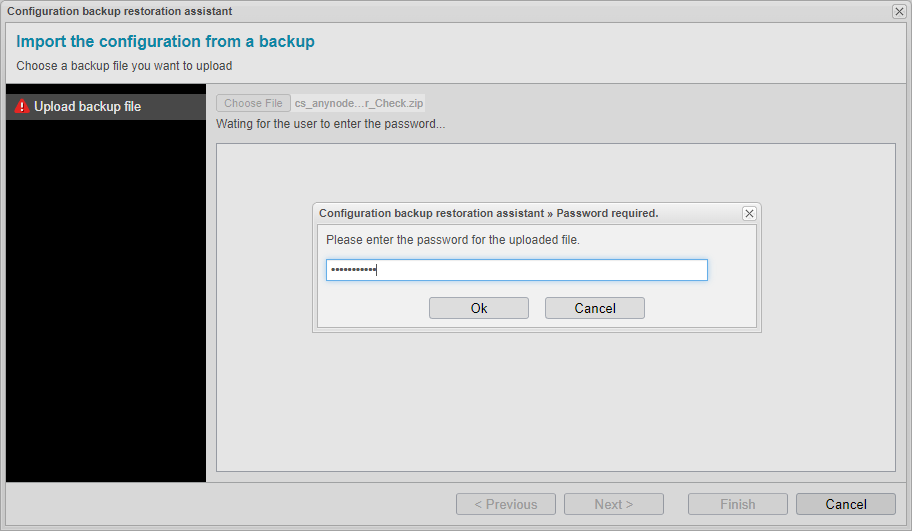
In the configuration backup restoration assistant, choose the backup ZIP file and enter the password for the uploaded file, if needed.
Click on the button.

You will get an overview with details of the chosen backup file.
Click on the button to proceed.
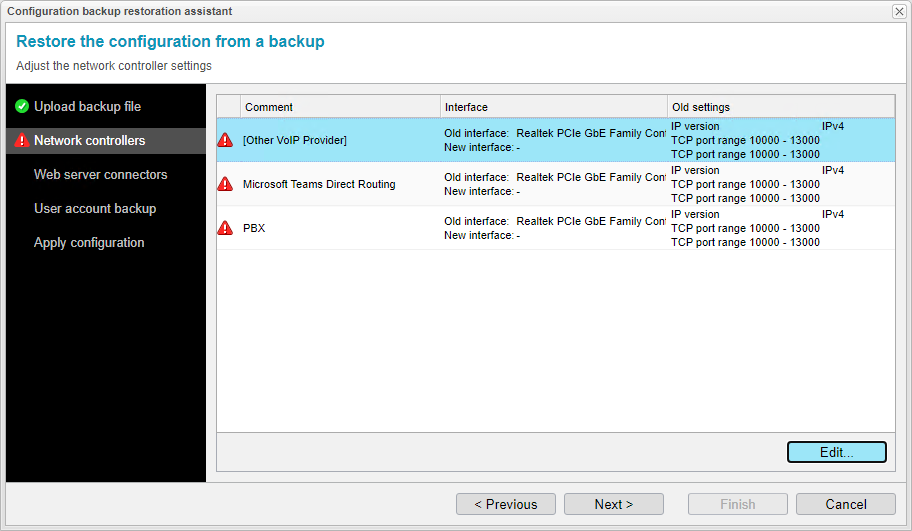
If needed, adjust the network controller settings with the button.
Otherwise, click on the button. In this scenario, we are migrating to new hardware and must customize the network controller configurations accordingly.
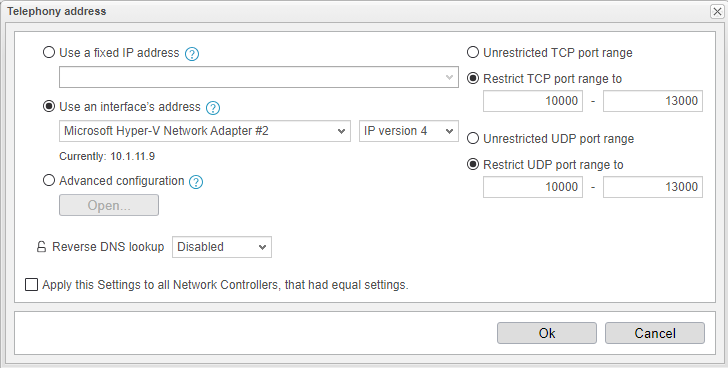
In our case, the new network controller is configured as the Microsoft Hyper-V Network Adapter for our new hardware.
Click on .

Once all network controllers have been adjusted to the new hardware, we receive a summary displaying both the old and new network interfaces.
Click on the button.
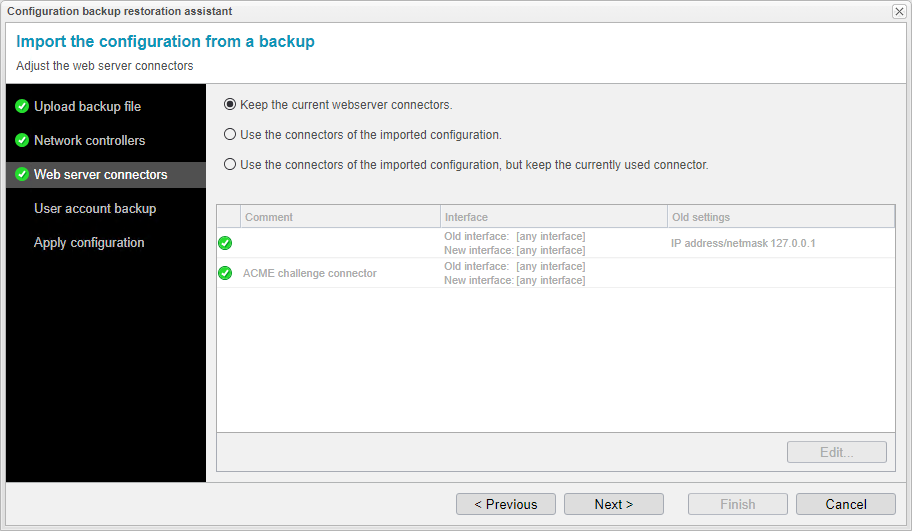
Adjust the Web server connectors according to your requirements.
The corresponding connector will be automatically installed when using an ACME service for certificate management, regardless of the selected option.The default setting is Keep the current web server connector of the new anynode without any option for editing or adjustments.
The option Use the connectors of the imported configuration will overwrite all existing connectors on the new anynode. If you've previously set up connectors in the old anynode and want to continue using them on the new anynode, use this option. Click on the connector and use to adjust the network settings, if necessary.
Please note that with this option, depending on your connector's configuration, you may lose access to your system after executing the restore function if the connector from the backup is utilized.
The option Use the connectors of the imported configuration but keep the currently used connector allows you to apply the settings from the imported configuration, but the existing connector on the new anynode that is currently in use will remain unaffected.
Utilize the option to modify the network settings as needed.In our example, we will use the default value and keep the current web server connectors.
Click on the button to continue.
Choose how to manage users from the imported anynode frontend configuration.

The option Keep the user accounts, Azure AD authority, and LDAP authorities currently configured for this anynode will not import all existing users, Azure AD ,and LDAP authorities from the old anynode. You'll need to utilize the existing user management on the new anynode or create a new one accordingly.
If you've previously set up users in the user management of the old anynode and want to continue using them, use the option to overwrite the user accounts while resetting the password of anadmin and enabling the account.
The password for the standard user anadmin will always be reset. Assign a new password following the already established rules: The password must contain a minimum of eight characters and should not include number sequences like 1234 for security reasons. The wizard will inform you during input whether the password is valid.
In our example, we'll utilize the users previously created in the old anynode and import them to the new anynode.
Click on the button to proceed.
The configuration backup restoration assistant has now gathered all the necessary settings and is ready to perform the restoration.
Click on .
Click on the button to close the configuration backup restoration assistant.
Upon successfully restoring the backup file, you will need to reclaim write permissions for technical reasons.
In the upper menu, click on Configuration and Take Control.

Congratulations, your new anynode is now ready for immediate use with the previous configuration on the new hardware.
Create Configuration Restore via REST API
At this point, we want to emphasize that there is no REST API support for the restore function. If you want to use the restore function on a system different from the one where the backup was created, you must perform a network controller mapping in the anynode frontend. This functionality is not available via the REST API.
Restore with a Hot Standby System
In this chapter, we will delve into the procedures and considerations involved in restoring data on a hot standby system.
Restore on a Primary and Secondary System
Create a restore on the secondary system as described previously, ensuring that it includes at least the frontend configuration.
Before setting up a new replication connection between the primary and secondary systems, make sure to restore the system. The restoration process for the secondary system mainly deals with frontend settings (like user management, web server connector, and certificate issuance) and monitor configurations (such as call history, event logs, and monitor settings), rather than the anynode configuration itself, which gets replicated from the main system anyway.
During a backup, IPC access files, which contain private keys and information about which processes in anynode can access inter-process communication, are not generally backed up. Therefore, during a restore, you must manually create the local connector on the secondary system again, import it to the primary system ,and re-add the IPC file on the primary system.
On the secondary system, navigate to Extras, Backends, Local and Connectors.
Do not use the combo box in the top right menu to switch to the secondary system. You must physically access the frontend of the secondary system.
Click on the button to add a local connector.
Choose the option: Create a connector to replicate the anynode configuration from another system to this one.
Refer to our Hot Standby video tutorial for details and further steps.
Save the file for import on the primary system and click .
Make sure you exit the connector assistant now by clicking on the button.
Then, perform the restore on the primary system.
If the anynode frontend configuration is included in the backup, you need to delete the imported backend on the primary system. Navigate to Extras, Backends, Remote, Instances.
Choose the existing backend and click on the button.
Click on the button.
Click on the button and select the backend definition file you want to import.
Choose the option: Start the replication directly and overwrite the configuration of the replica system.
Click on the button to close the import assistant.
Select the imported backend and click on the button.
Click on the button.
Under anynode, click on the button for the IPC access file.

Click on the button.
Click on the button to close the backends overview.
Navigate to your Hot Standby in the left menu tree and click on the IPC Client object.
Click on the button.

In the IPC client import assistant, click on the button and import the IPC access file.
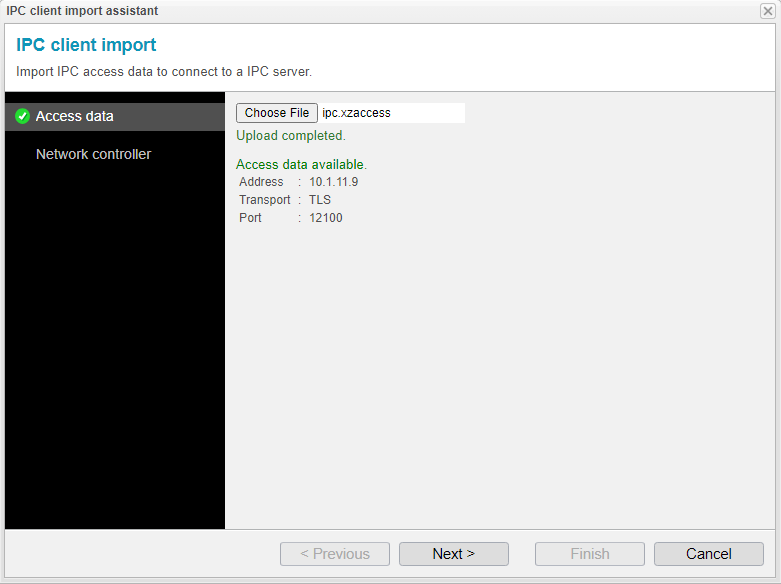
Click on the button.
Select a Network controller that determines the interface and/or IP address to be used for the communication to the IPC server. It is important that the IPC server is reachable via this network controller. In our example, we will use a fixed IP address. With these settings, a connection to the IPC server should be established.

Click on the button to close the assistant. Use .
Navigate to the Hot Standby object and check for an active Hot Standy system.

Restore on a Primary System only
During a restore operation that exclusively involves the primary system, you only need to execute the restore process. No further manual actions are required in this case.
Restore on a Secondary System only
Perform the restore on the secondary system.
Subsequently, follow the steps described earlier for a full restore on both primary and secondary systems.
Performing Restore When Call History and Events Are Stored in External Database
For external call history and event databases, backup and restore operations are not conducted; these processes are exclusive to the internal (SQLite) database. Only the access to the external database is backed up and restored.
Once access to the external database is restored during the restore process, the data becomes immediately accessible in the monitor mode. Make sure the database access is not restricted to a specific host or IP-address when restoring anynode on a new host.
Congratulations! You have now learned all the crucial details for a successful backup and restore. You can now continue your work with confidence and peace of mind. Happy using our software!