Setup the anynode Trunk
Please be aware that this document exclusively covers the Trunk configuration and doesn't provide details on other configurations like Locations or Users. To configure the anynode SBC trunk, follow these steps:
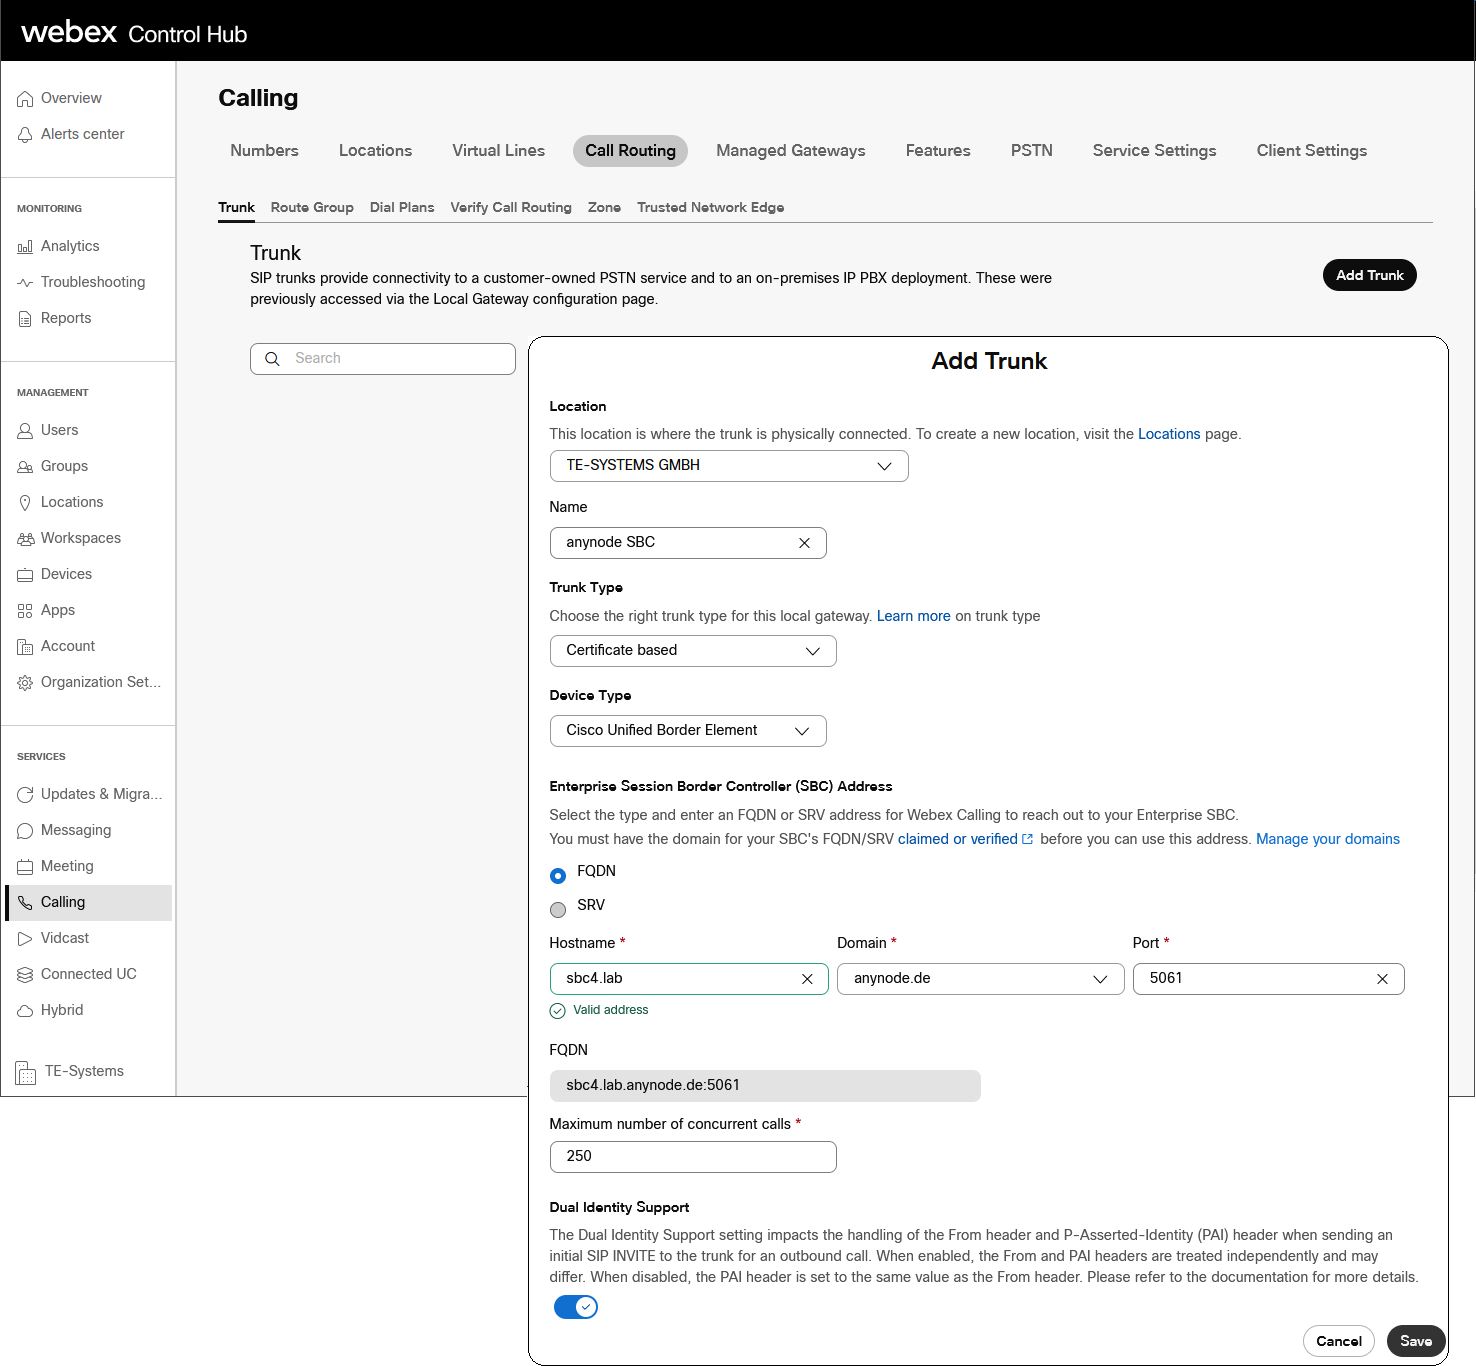
Go to the Trunk configuration in SERVICES ▷ Calling ▷ Call Routing ▷ Trunk. You can see where to find it in the screenshot below.
Inside the 'Add Trunk' dialog, pick your defined Location, set the trunk Name, and make sure to select 'Certificate based' as the Trunk Type and 'Cisco Unified Border Element' as the Device Type.
Set the claimed and verified Enterprise Session Border Controller (SBC) Address, which, in this case, is sbc4.lab.anynode.de:5061.
Ensure you set the Maximum number of concurrent calls to 250 and activate Dual Identity Support.
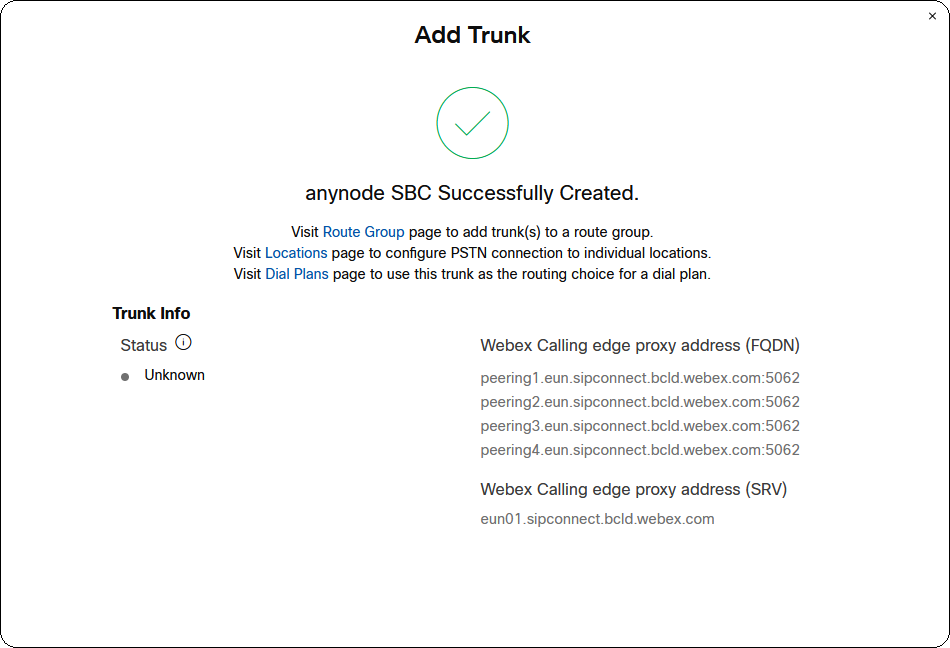
Once you've configured everything correctly, your trunk will be created successfully. Make sure that the Webex Calling edge proxy address (FQDN) and the Webex Calling edge proxy address (SRV) are set as expected.
Ensure that this address/FQDN is accurately configured as a SIP proxy server (URI) in the Cisco Webex Calling Node, as demonstrated in the guided setup example in the Proxy section.
Please note that the refresh interval in the Cisco Webex Control Hub is set to 5 minutes, so changes in the Trunk Info state might take some time to reflect. You can check the trunk status later, and you can find an example in the SIP Trunk Status 'Online' chapter.