anynode SIP Capture Agents Configuration
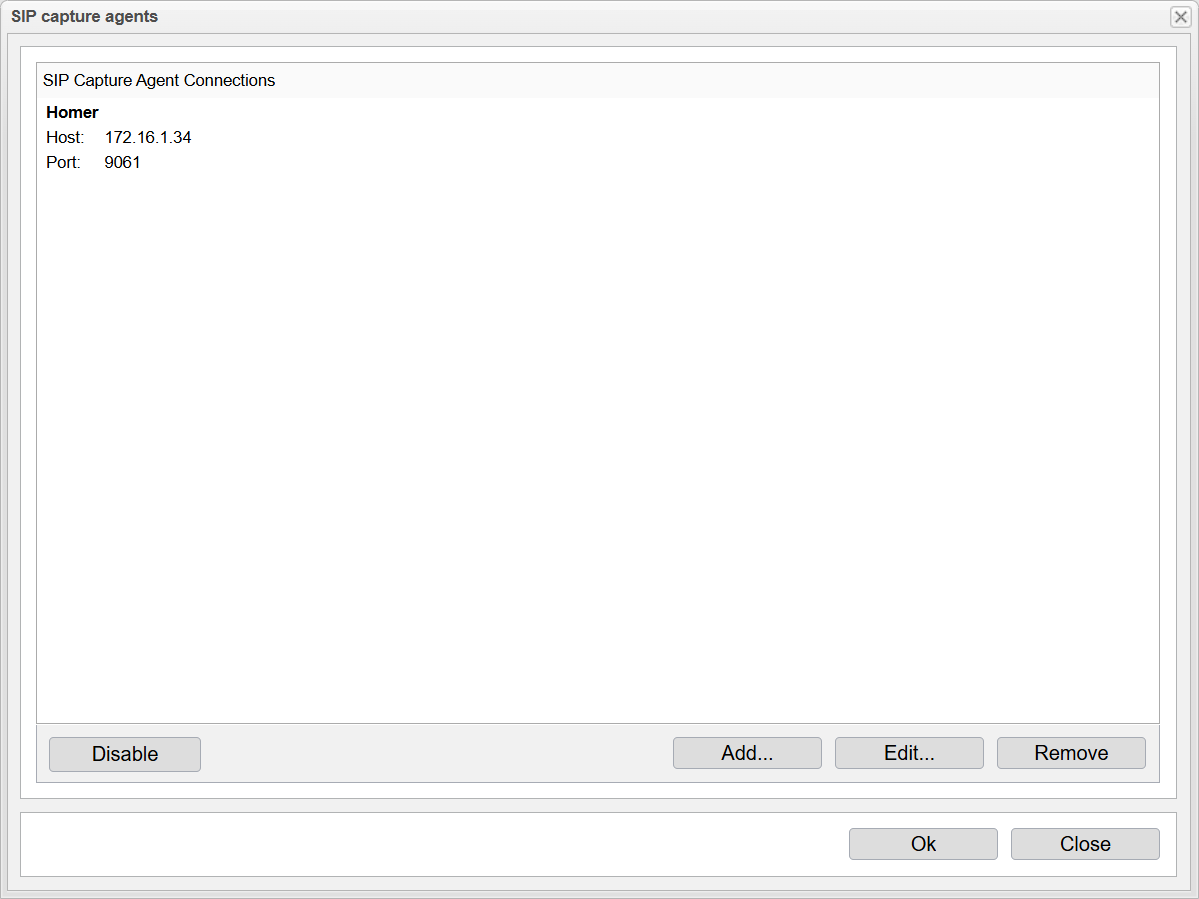
In the anynode frontend, open the SIP Capture Agent via Extras and SIP Capture Agents. This opens the overview of all configured SIP capture agent connections.

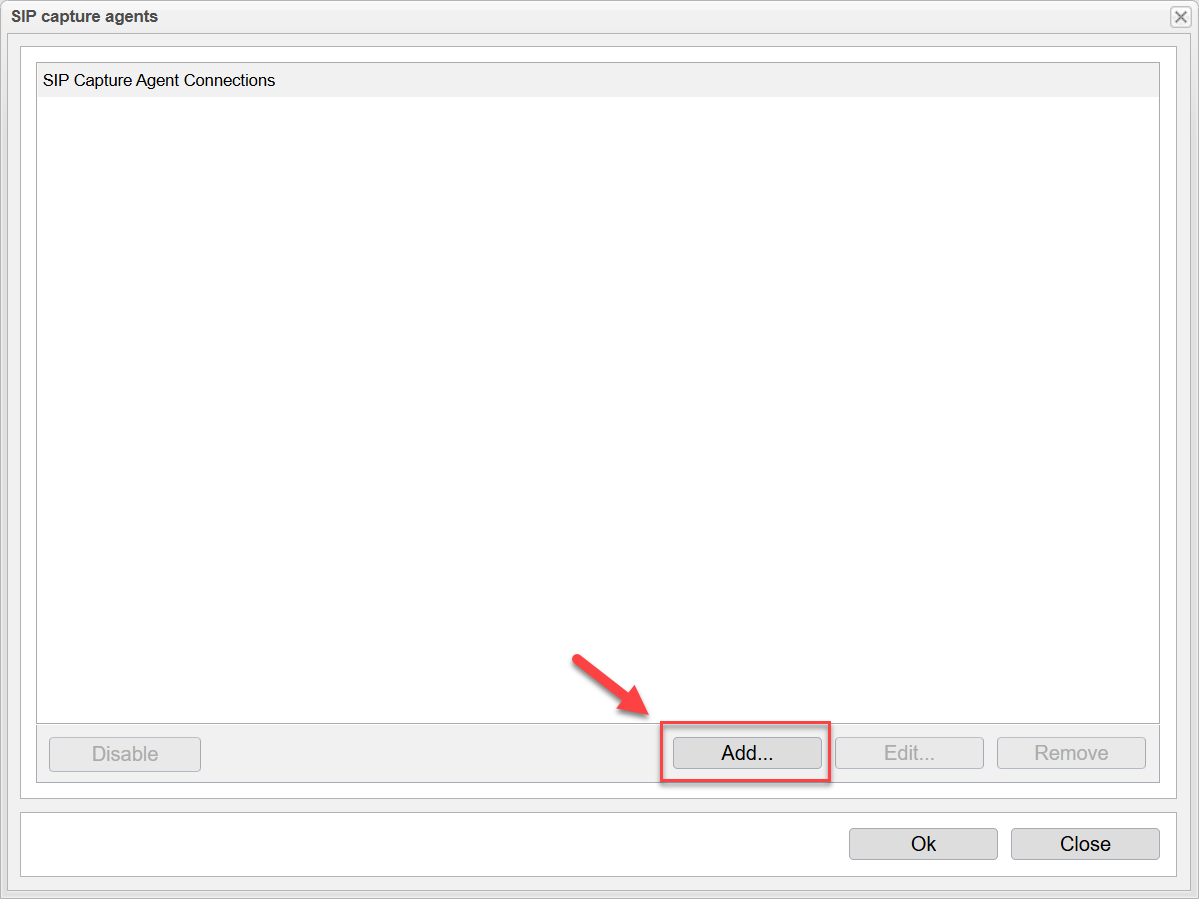
To create a new connection, click . This will open a configuration dialog where you can define the parameters for sending SIP flow data using HEPv3.
In the SIP Capture Agent Connection dialog, configure the following parameters: SIP capture protocol: Use the default HEP V3.
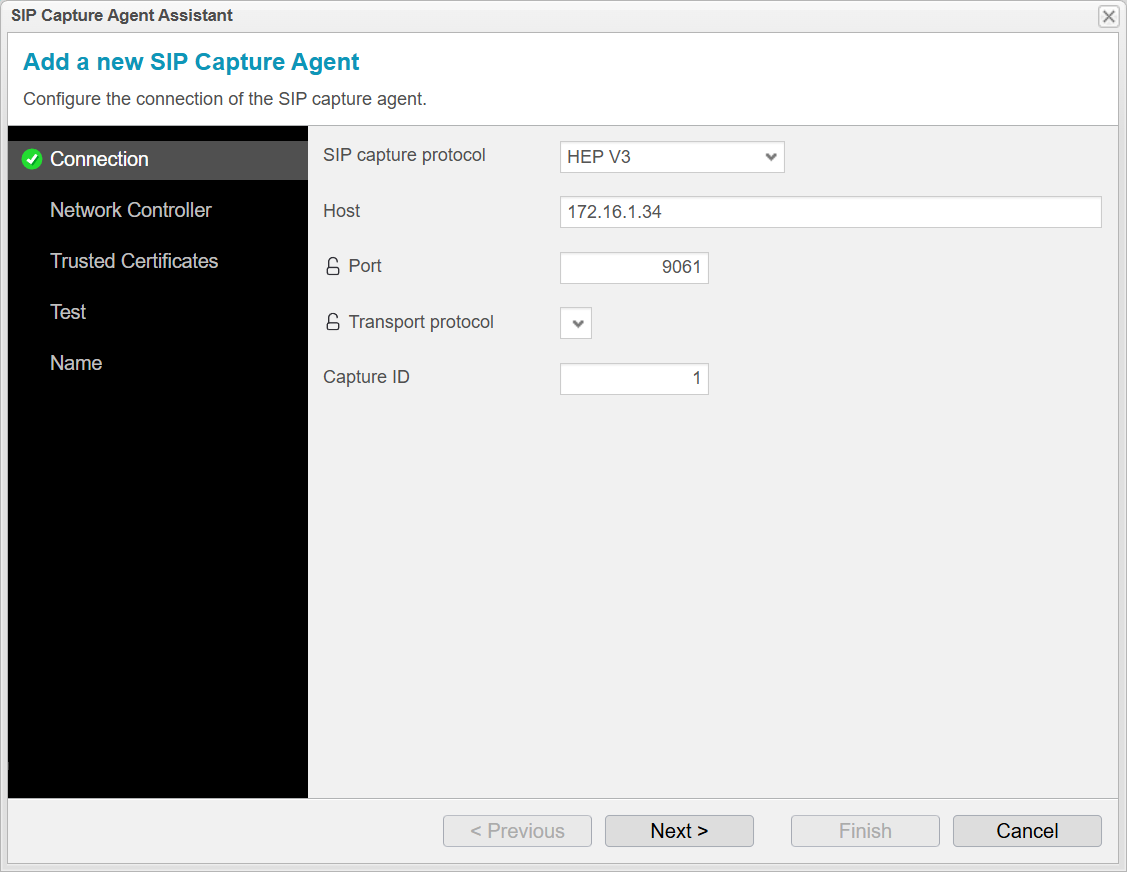
Host: Enter the IP address or hostname of the system where Homer 10 is running with the TCP
Listener. This is 172.16.1.34
Port: Set this to 9061 (the default port for HEP traffic used by anynode).
Transport Protocol: Select TCP.
Capture ID: Identifier to distinguish between multiple anynode systems. In our example, we have got only one anynode system.
Click to continue.
In this step, you define how anynode selects the source IP address used for sending SIP capture data. This is important to ensure that the HEP messages are sent from the correct interface and are routable to the target system (Homer TCP listener).
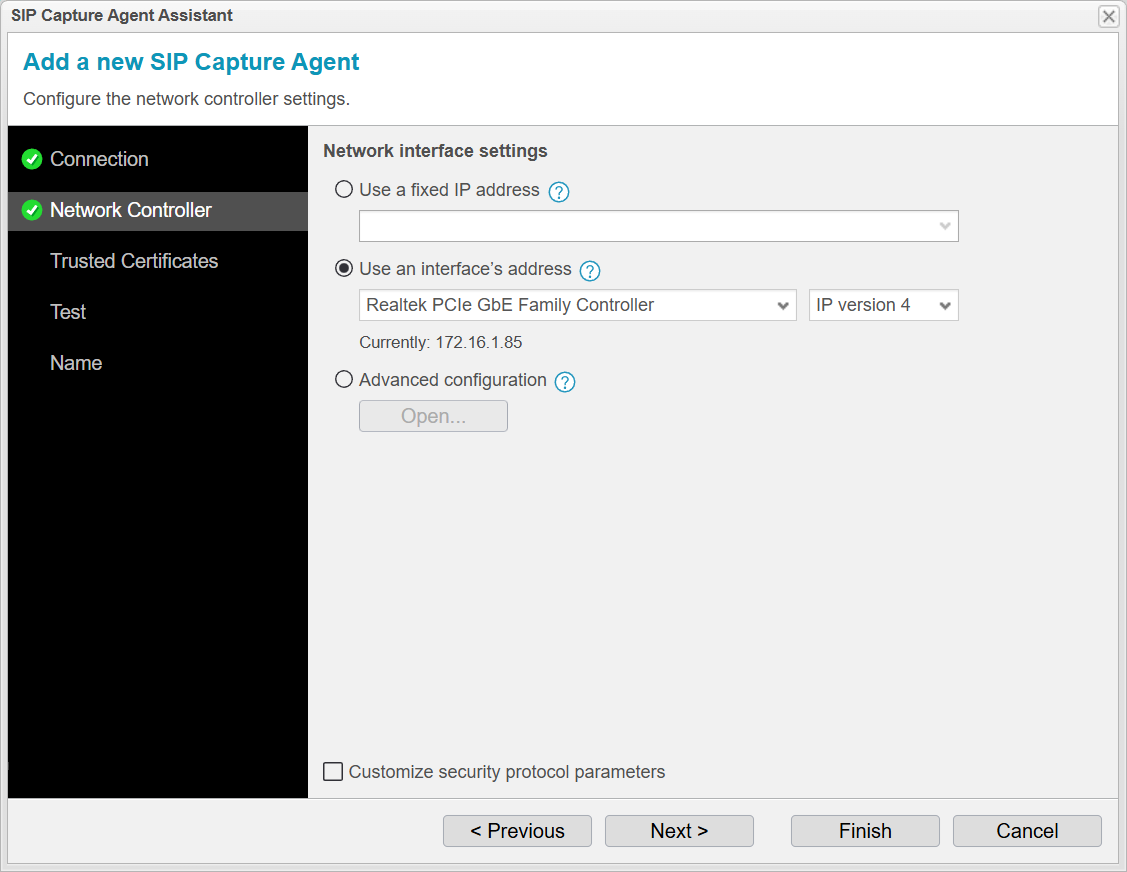
You can choose from the following options:
Use a fixed IP address
anynode will always use the specified IP address, regardless of changes in the network. This is suitable for static network configurations where the IP address does not change. ⚠️ Not recommended if the system uses DHCP, IPv6 autoconfiguration, or other dynamic addressing.
Use an interface's address
anynode will automatically use the current IP address assigned to a selected network interface. Changes are tracked in real time, making this option ideal for dynamic environments (e.g., DHCP or IPv6). You must also specify whether to use IPv4 or IPv6.
Advanced configuration
Allows for flexible setups in roaming, multi-network, or high availability cluster environments. Useful when deploying anynode instances across multiple or shifting network contexts with shared settings.
Choose the option that best fits your deployment scenario to ensure reliable transmission of SIP capture data.
In our example, we choose the second option with the network card.
Click to continue.
In this step, you can configure Trusted Certificates for the SIP Capture Agent connection.
This setting matters only when TLS is used to send HEP data securely. It allows anynode to verify the identity of the remote HEP capture server by validating its TLS certificate against a trusted certificate authority (CA).
If your SIP Capture Agent is configured to use UDP or TCP, you can skip this step because these transports do not use encryption and therefore do not require certificate verification.

When TLS is enabled
-
the CA certificate of the remote HEP capture server.
-
This ensures anynode communicates only with trusted and verified endpoints.
-
If the certificate does not match, the TLS handshake will fail and HEP data will not be transmitted.
For most Homer 10 deployments—where HEP is typically sent over UDP or TCP to heplify-server—no trusted certificates are required.
When to use HEP over TLS
You should consider enabling TLS for HEP if:
-
The SIP signaling data contains sensitive information and must be protected in transit.
-
The capture server (e.g., Homer 10 or a remote monitoring system) is reachable over external or untrusted networks.
-
Your organization enforces security policies requiring encryption for diagnostic or monitoring traffic.
Click to continue.
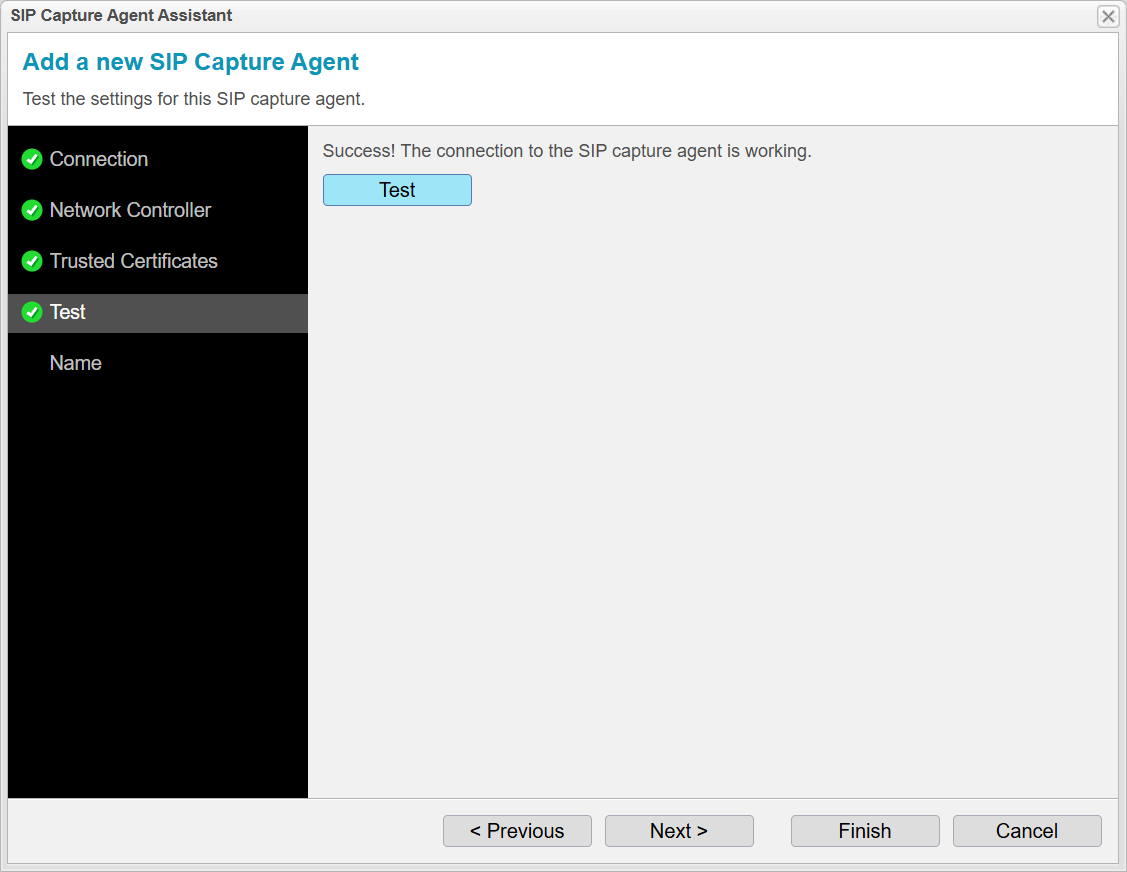
In the Test step of the assistant, you can verify that the configured SIP Capture Agent connection is working correctly.
Click the button to send a test HEP message to the target system (Homer).
This allows you to confirm that:
-
The network path to the destination IP and port is reachable.
-
The SIP Capture Agent is correctly sending data using the configured settings.
-
The target (Homer) is ready to receive and interpret the message.
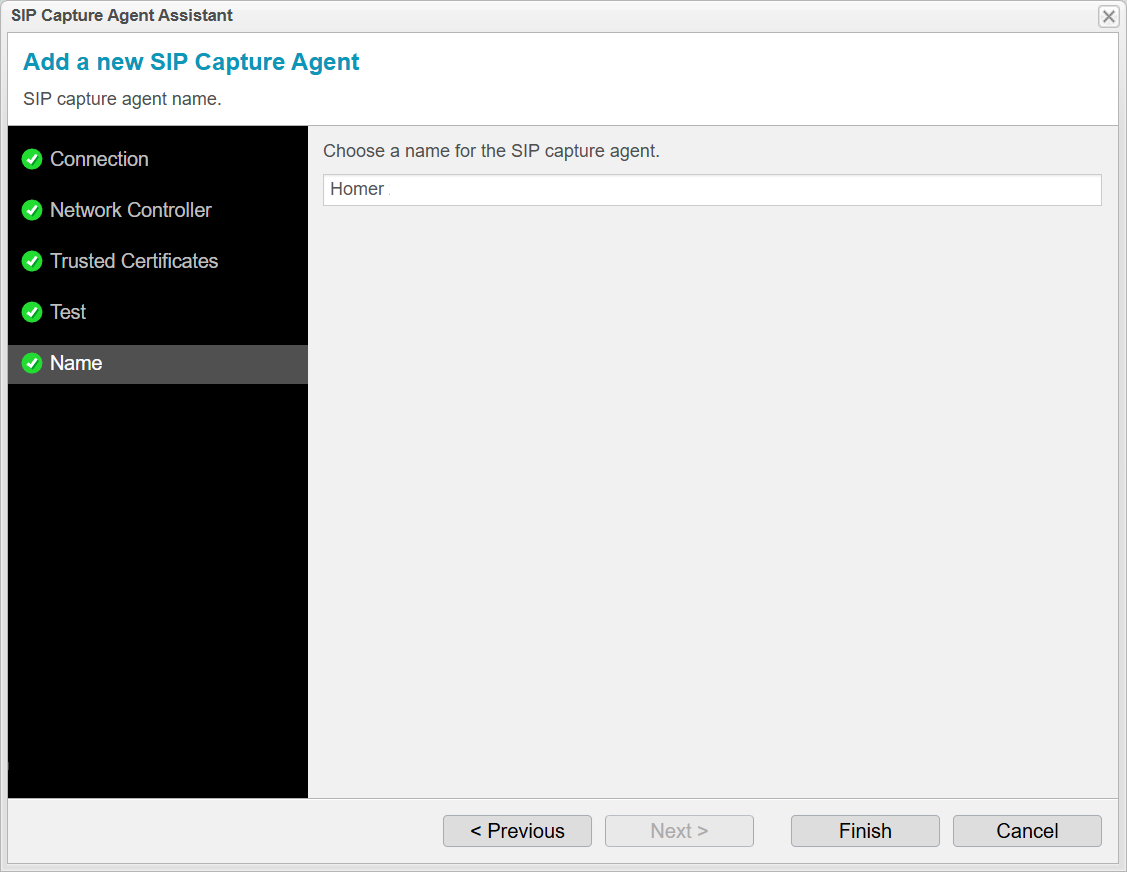
In the last step of the SIP Capture Agent assistant, you are asked to assign a name to the connection.
This name is used to:
-
Identify the SIP Capture Agent in the list of configured connections.
-
Distinguish between multiple capture agent setups (e.g., different destinations or network contexts).
-
Help with troubleshooting and logging by providing a meaningful label in log entries and system events.
Choose a descriptive and unique name, such as
-
Homer TCP Capture -
HEP v3 to Homer Collector -
TLS SIP Capture for External Trunk
In our example, we choose the name Homer.
Once the name is assigned, click to complete the setup.
The SIP Capture Agent is now configured and ready to send SIP flow data to the specified destination.
You will get an overview of all configured SIP capture agents. Click to close it.